Same network, step by step
For people using obsync.
One computer at home runs the server; your phone and your other computers sync with it whenever they are on the same Wi-Fi. There is no tunnel, no VPN, no domain and no account with anybody. When a device is away from home, its edits wait on the device and go up the next time it is back on that network.
The setup screens below are from the 2026-09-23 run: a Mac running the server and a desktop vault, and an iPhone on the same Wi-Fi. The Local Network permission screen was captured on 2026-09-25. Private names and codes are obscured.
What you need
- A computer that stays on while you sync, with Docker. The server image is built for 64-bit Intel and ARM machines, a 64-bit Raspberry Pi included. The run below used a Mac with Docker Desktop, and CI runs the same Compose file on Linux; a Windows host has not been recorded yet.
- Obsidian on each device.
- About twenty minutes, most of it the phone's certificate.
Start the server
Follow Compose with Caddy in Run the server. It verifies the image and starts it. Three values are yours to choose, and on a home network they are:
OBSYNC_HOST: a name every device can look up on your network. Either the server computer's own local name, which ends in.localand is answered by multicast DNS (mDNS) with nothing to configure, or a name you give the server in your router's DNS. Whether a device can look up a.localname depends on the device; if any one of yours cannot, use a router DNS name for all of them.OBSYNC_BIND_ADDRESS: the server computer's address on your network. The server then answers only on that network.- The ports: 80 and 443. On a Mac, Docker Desktop refuses them unless
Enable privileged port mapping is on in its settings. Otherwise set
OBSYNC_HTTP_PORT=8080andOBSYNC_HTTPS_PORT=8443, and add:8443to the name everywhere below.
Where to find each, by the server computer's system:
| Server computer | Its address, for OBSYNC_BIND_ADDRESS |
Let your devices in | Its .local name, for OBSYNC_HOST |
|---|---|---|---|
| macOS | ipconfig getifaddr en0 (Wi-Fi) |
System Settings → Network → Firewall → Options: turn off Block all incoming connections and let Docker accept incoming connections. Stealth mode can stay on | System Settings → General → Sharing → Local hostname |
| Windows | ipconfig: the IPv4 address of the Wi-Fi or Ethernet adapter |
In PowerShell as Administrator: New-NetFirewallRule -DisplayName obsync -Direction Inbound -Protocol TCP -LocalPort 80,443 -Action Allow -Profile Private, with your home network set to Private in Windows' network settings |
Not recorded on Windows: use a router DNS name |
| Linux | hostname -I: the first address |
If the host firewall drops the phone: sudo ufw allow 80,443/tcp, or sudo firewall-cmd --permanent --add-port=80/tcp --add-port=443/tcp then sudo firewall-cmd --reload. A ufw rule cannot keep devices out, because Docker's published ports bypass it (Docker's firewall notes) |
hostname, followed by .local, when Avahi runs (most desktop distributions) |
Let your devices in. A computer's firewall can drop every connection from
the phone even while the server is running; the table's third column says what
to allow, on the ports you moved them to if you did. Which devices can connect
at all is decided by OBSYNC_BIND_ADDRESS, your router and your firewall,
never by the name or the certificate
(Which address it is published on).
Use the name you chose for OBSYNC_HOST in the plugin's Server URL.
The Wi-Fi address used for OBSYNC_BIND_ADDRESS is a different setting.
Replacing the name with that address can cause a TLS error because the
certificate identifies the name
(The certificate is for another name).
Keep certificate checks enabled and use the matching name.
Export the certificate
Your server makes its own certificate authority, so every device must trust it
once. Export it with the one command in
Trust the certificate authority.
It produces obsync-root.crt. On a computer, the same section has the one
command that installs it.
Trust the certificate on the phone
- Send the file to the phone. AirDrop, mail, or save it to iCloud Drive.
If AirDrop saves it to Files without asking anything, open the Files app
and find
obsync-root.crtthere. Open it.
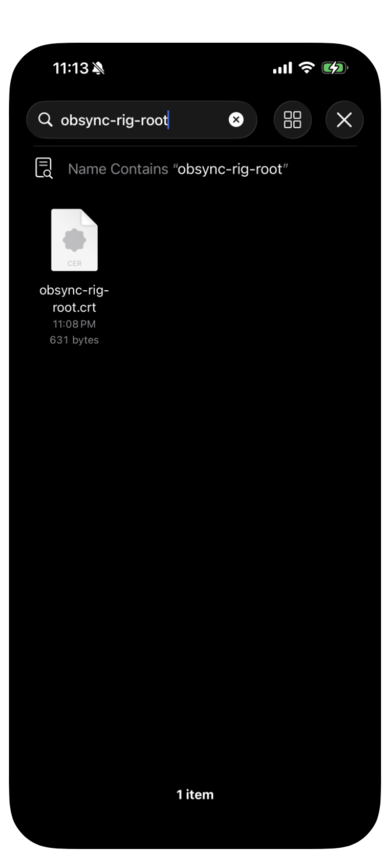
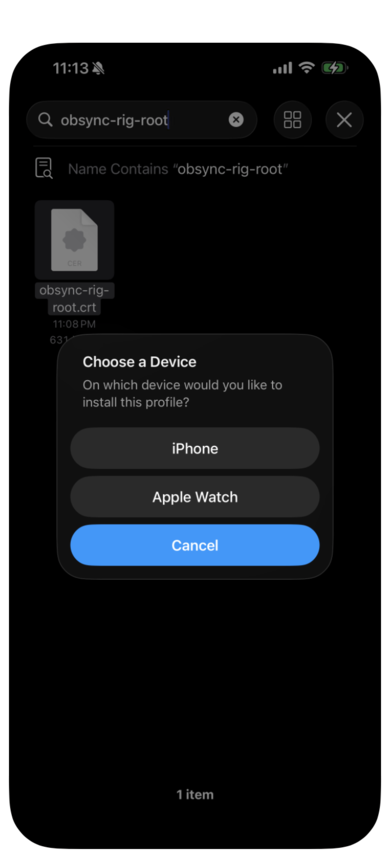
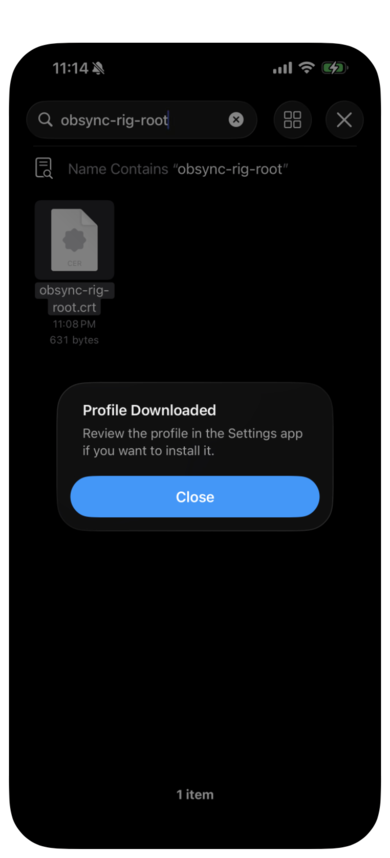
- Choose the phone. iOS asks which device should install it; choose iPhone. It then says the profile was downloaded; select Close.
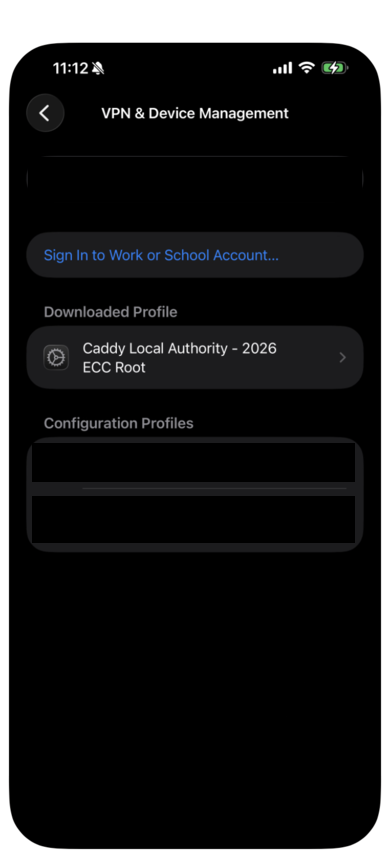
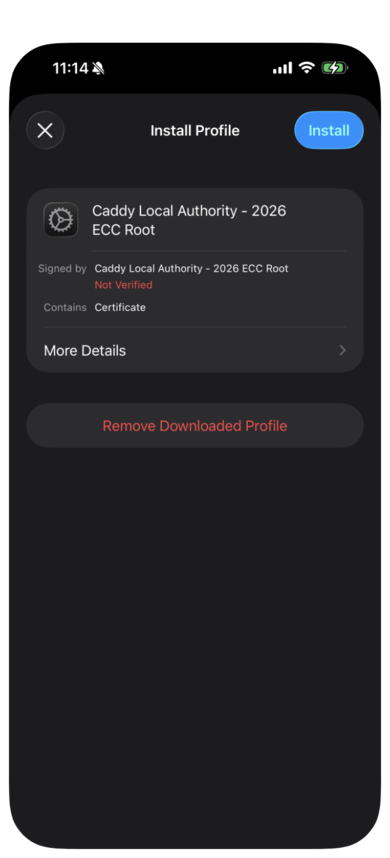
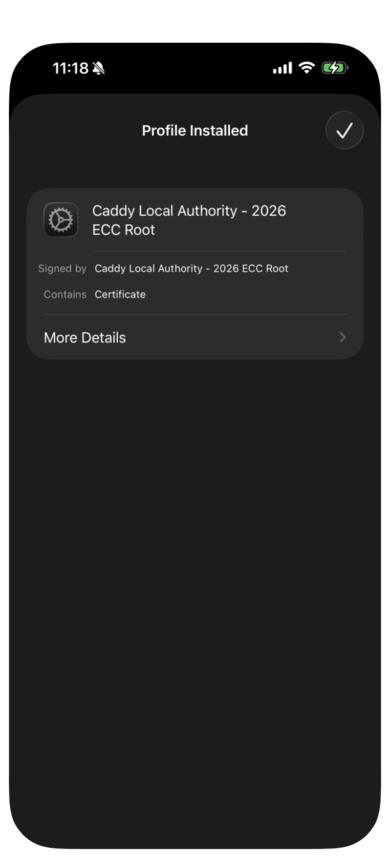
- Install it. Open Settings → General → VPN & Device Management. The certificate is listed under Downloaded Profile. Open it, select Install, enter your passcode, and confirm Install. It reads Not Verified because it is your own authority and not a public one; that is expected. Then select Done.
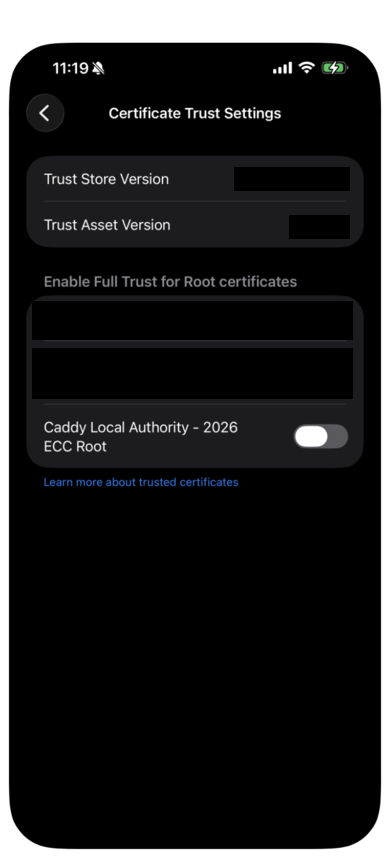
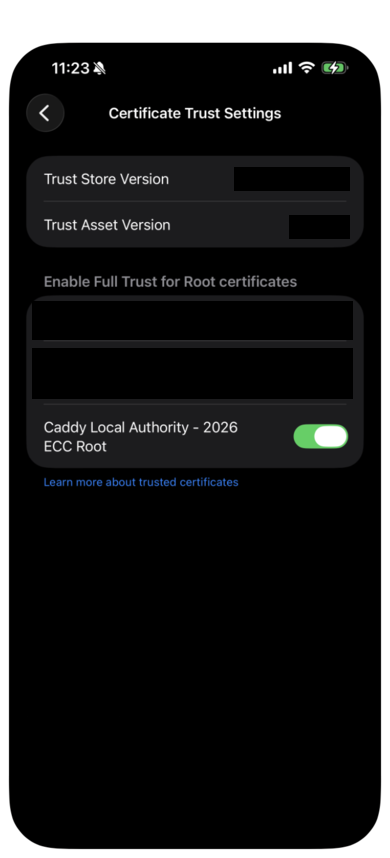
- Trust it. Installing is not enough, and Obsidian refuses the server until this switch is on. Open Settings → General → About → Certificate Trust Settings (at the very bottom). Turn on your certificate, then select Continue.
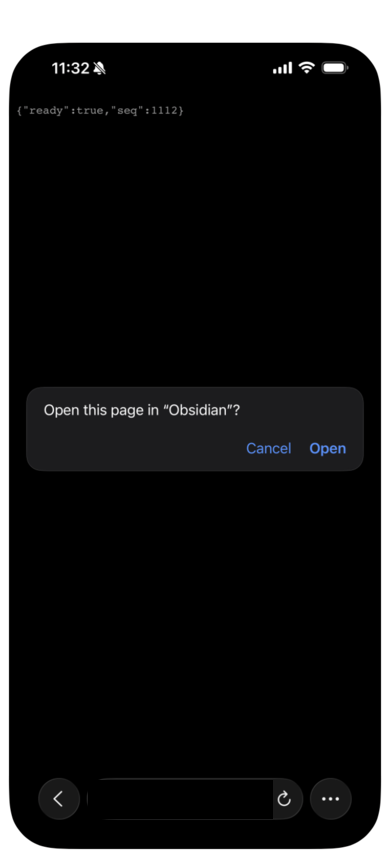
- Check it. In Safari on the phone, open
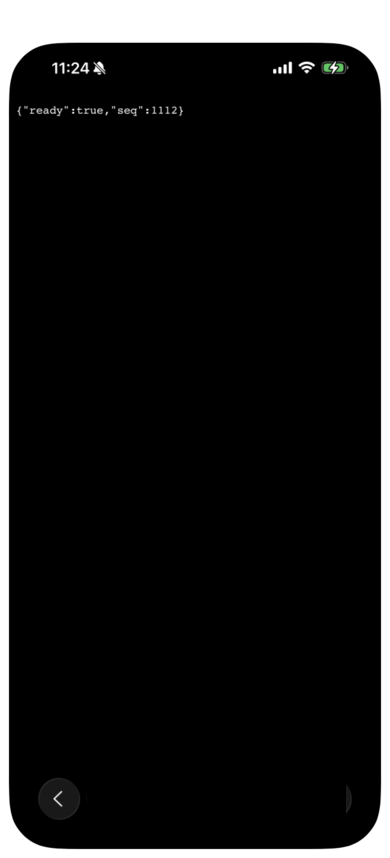
https://<your name>/readyz, with:8443if you moved the port. A page reading{"ready":true,...}means the phone reaches the server and trusts it. For a privacy or TLS warning, first check that the address uses yourOBSYNC_HOSTname, then check the trust switch in step 4. "The network connection was lost" can mean the firewall above, or a phone that is not on the same Wi-Fi.
Set up the first device
On your computer, follow the Quickstart to install the plugin,
set Server URL to your name (with :8443 if you moved the port), and run
Setup or recover with the server's setup token. That device creates the
vault key and shows you the recovery phrase.
Add the phone
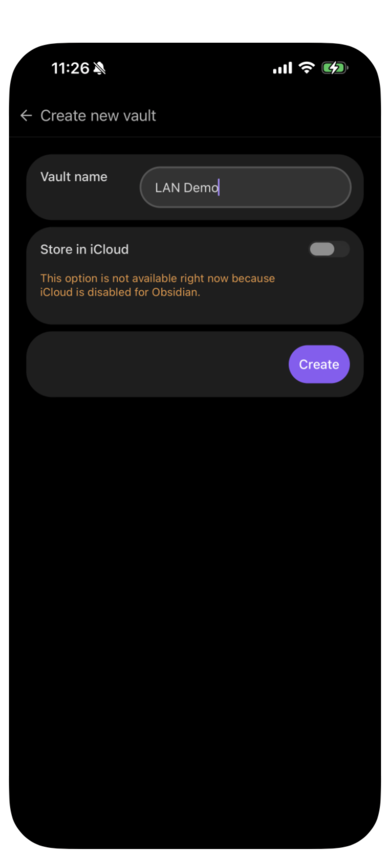
- Make or open the vault on the phone. Any vault except one another tool is already syncing.
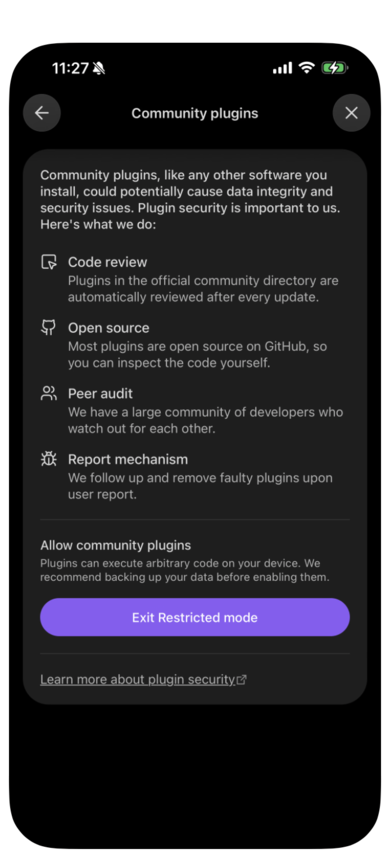
- Allow community plugins. Settings → Community plugins → Exit Restricted mode, then Browse.
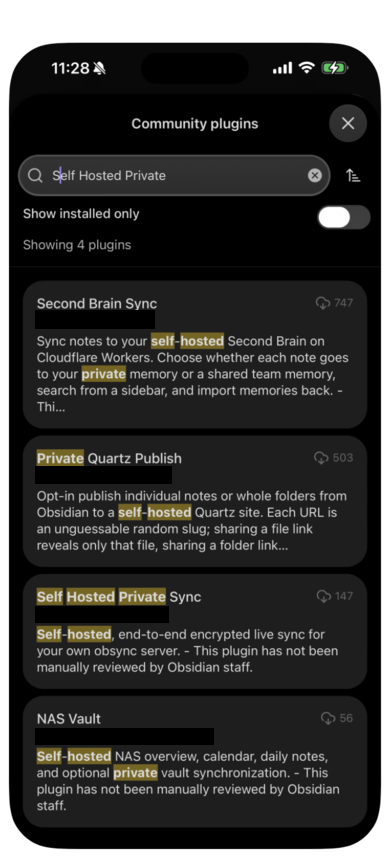
- Find the plugin by its full name: Self Hosted Private Sync. A shorter search such as "Private Sync" can bury it under other results. Select it, then Install, then Enable.
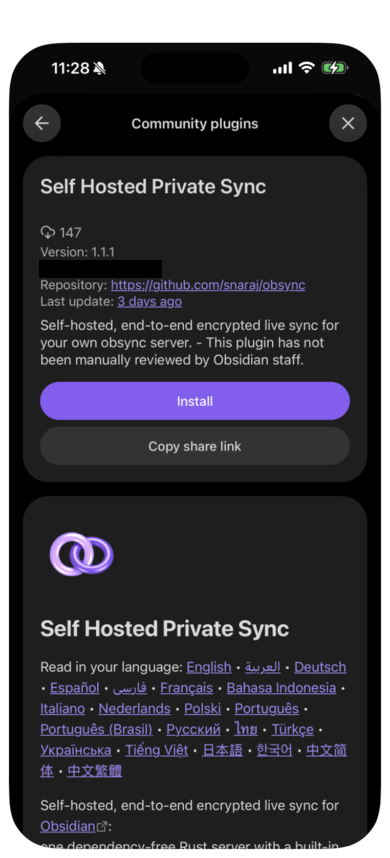
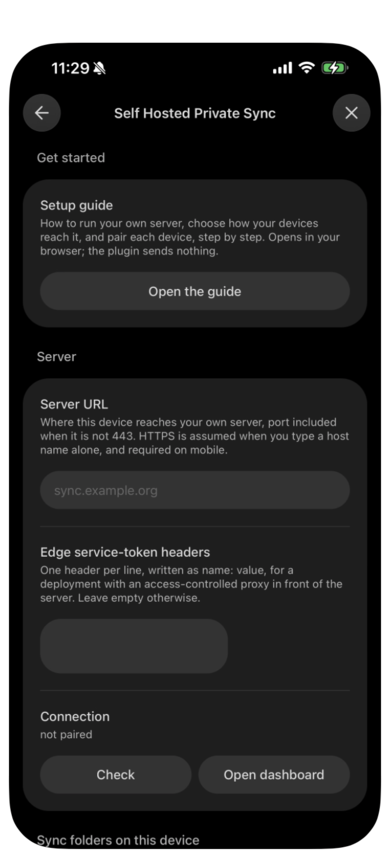
- Set the Server URL under Options, exactly as on the first device. The setup guide is one press away at the top of this page.
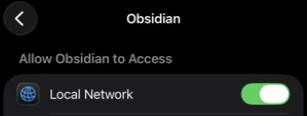
- Let Obsidian reach your home network. In the iPhone's Settings → Apps → Obsidian, check that Local Network is on. Safari and Obsidian have separate access: reaching the server in Safari does not establish that Obsidian has this permission. Return to the plugin and select Check.
Pair
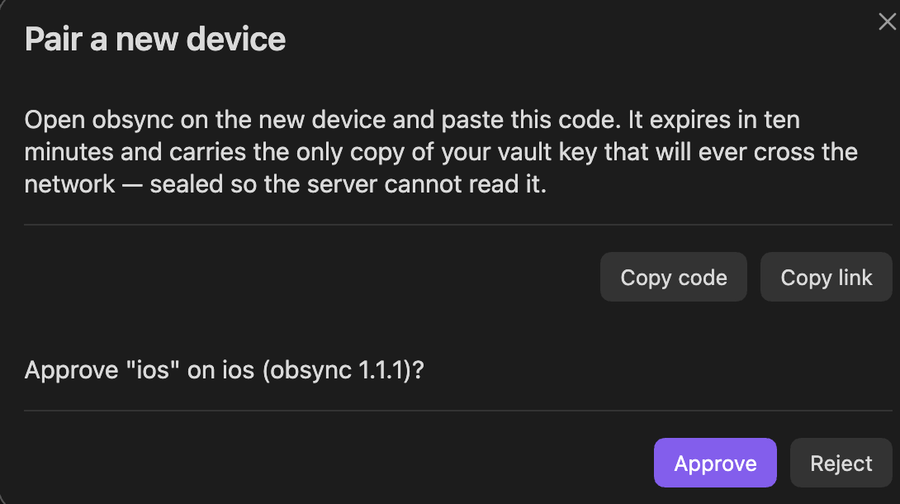
- On the computer, run Pair a new device from the command palette or the settings tab. It shows a one-time code, valid for ten minutes.
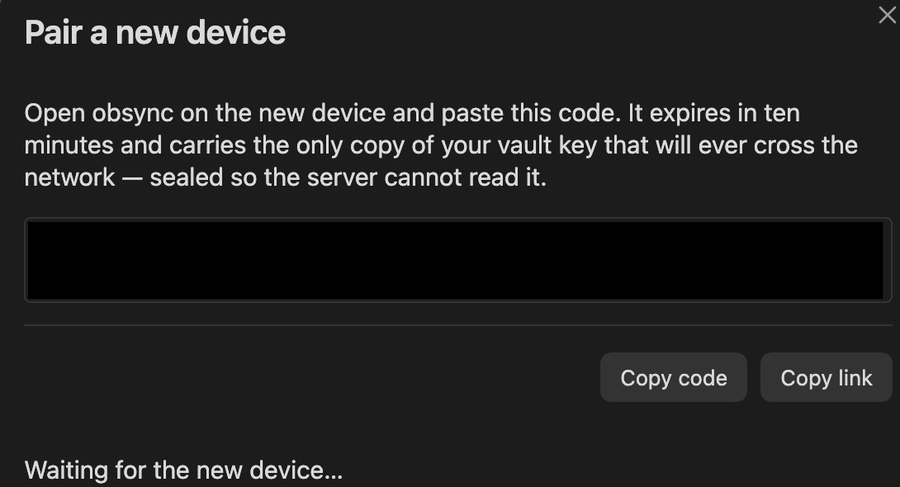
- On the phone, open the code. The easiest way is Copy link on the computer, then send the link to the phone and open it: Safari offers to open it in Obsidian, with the code already filled in. Or paste the code under Pair this device. Select Pair.
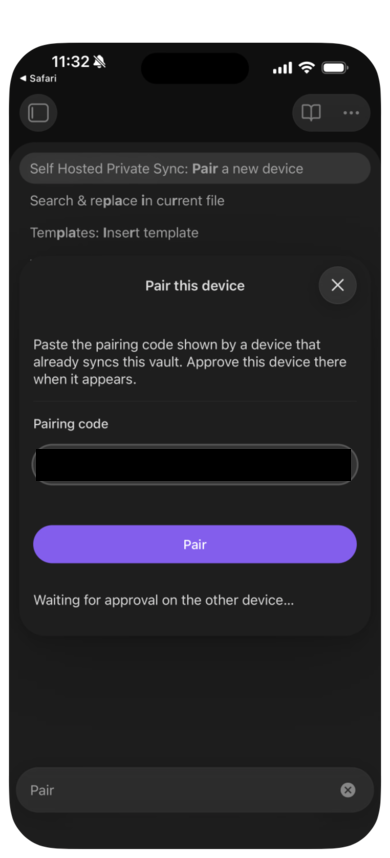
- Approve it on the computer. It names the new device and its platform. Until you approve, the phone has no access of any kind.
Sync
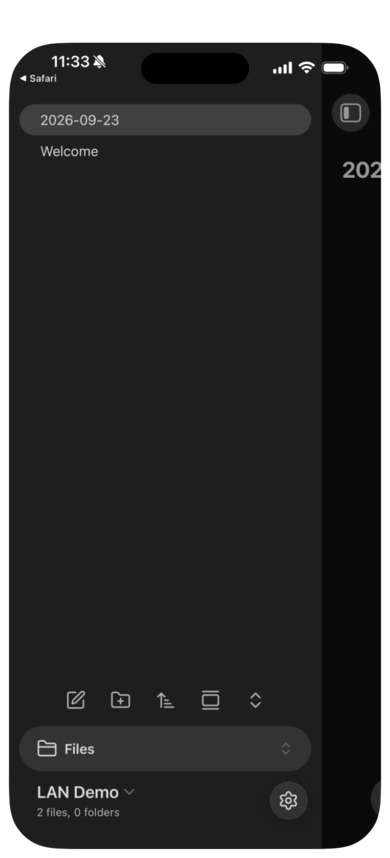
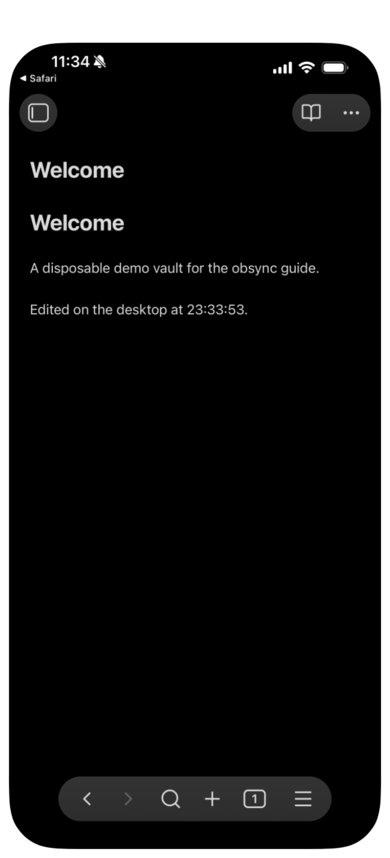
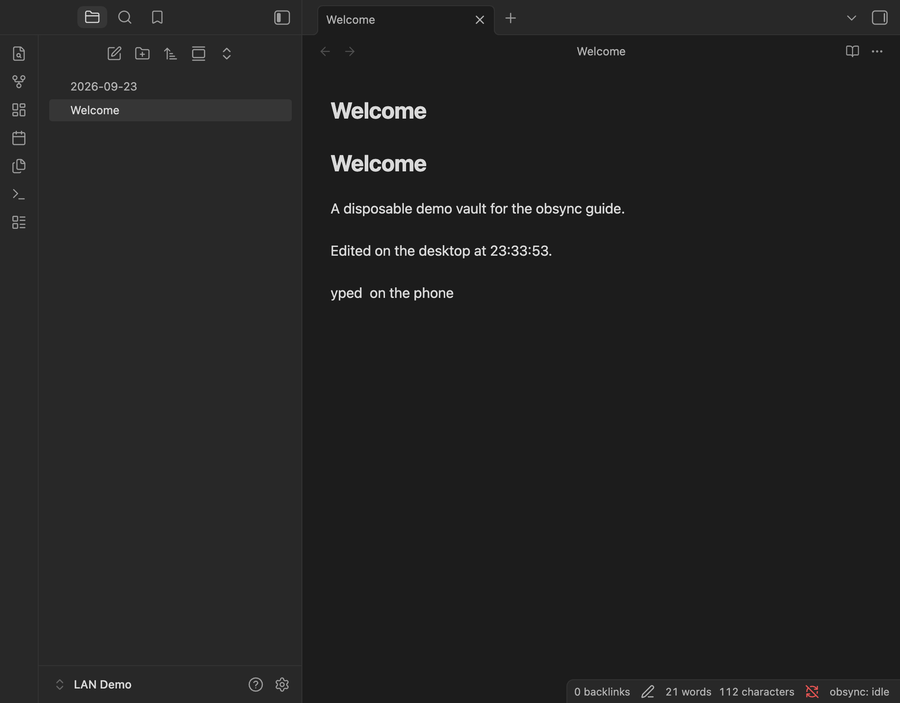
Within seconds the phone holds the computer's notes, and an edit on either side reaches the other.
Afterwards
- Away from home, a device keeps its edits and sends them when it is back on the network. From 1.1.2 it resumes by itself.
- Your other computers pair the same way, and trust the certificate with the one-line command for their system in Trust the certificate authority.
- Android may decline a certificate you installed yourself; if it refuses to connect, that page lists the fix.
- To stop trusting the certificate, remove the profile under Settings → General → VPN & Device Management.