Quickstart
For people using obsync.
The first device and the second one, every step in full. It assumes your own server is already running; if it is not, start with Run the server and come back here.
Your notes remain ordinary files on your devices. The server stores encrypted copies; it does not receive the key that opens your notes or their names. You choose where it runs: a computer at home, a homelab, or another host you control. You can reach it away from home through your own VPN or HTTPS front end. Cloudflare is one optional route. Run the server explains those choices, including who you trust to handle the connection.
Keep a separate backup of your vault and store your recovery phrase somewhere safe. Sync carries changes between devices, including unwanted changes made by a compromised device; encryption alone cannot protect that device from malware or replace a backup. Recovery explains what obsync can restore, and Obsidian's backup guide explains how a separate backup protects your local files.
Get synced in five steps
The installation path, from an empty vault to two devices in sync. Older captures call the setup row First-time setup; its current name is Setup or recover. All five assume your own server is already running.
- Install from Community plugins. In Settings → Community plugins → Browse, search for Self Hosted Private Sync and select Install, then Enable — the same way every other Obsidian plugin arrives, on every platform.
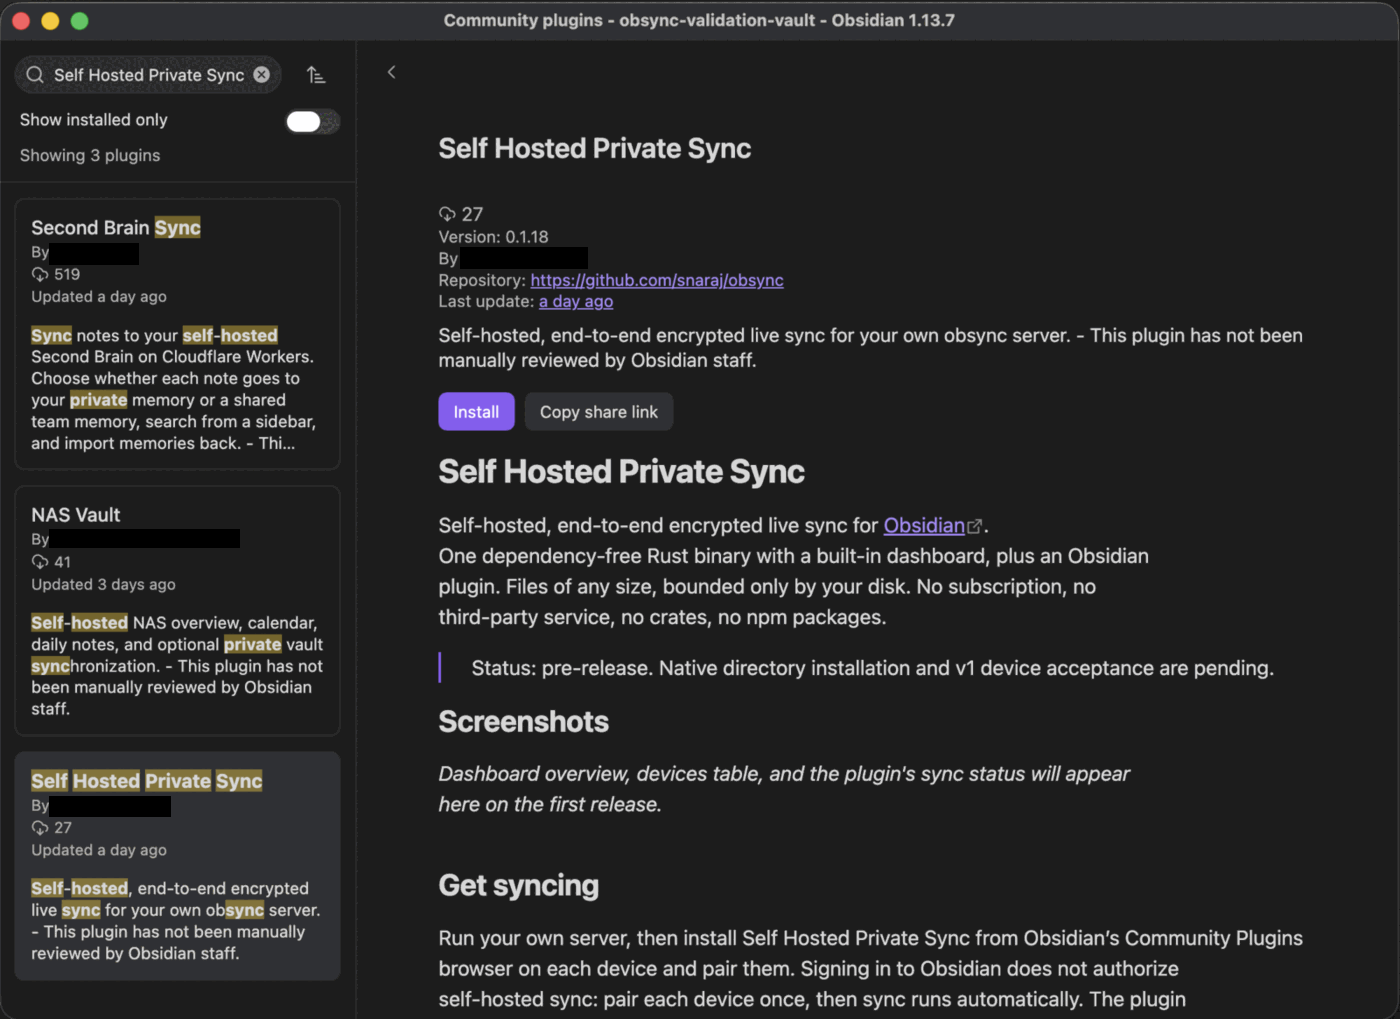
- Point it at your server and set it up. Open the plugin's settings tab, set Server URL to your own server, choose which folders this device syncs, then paste your setup token under Setup or recover.
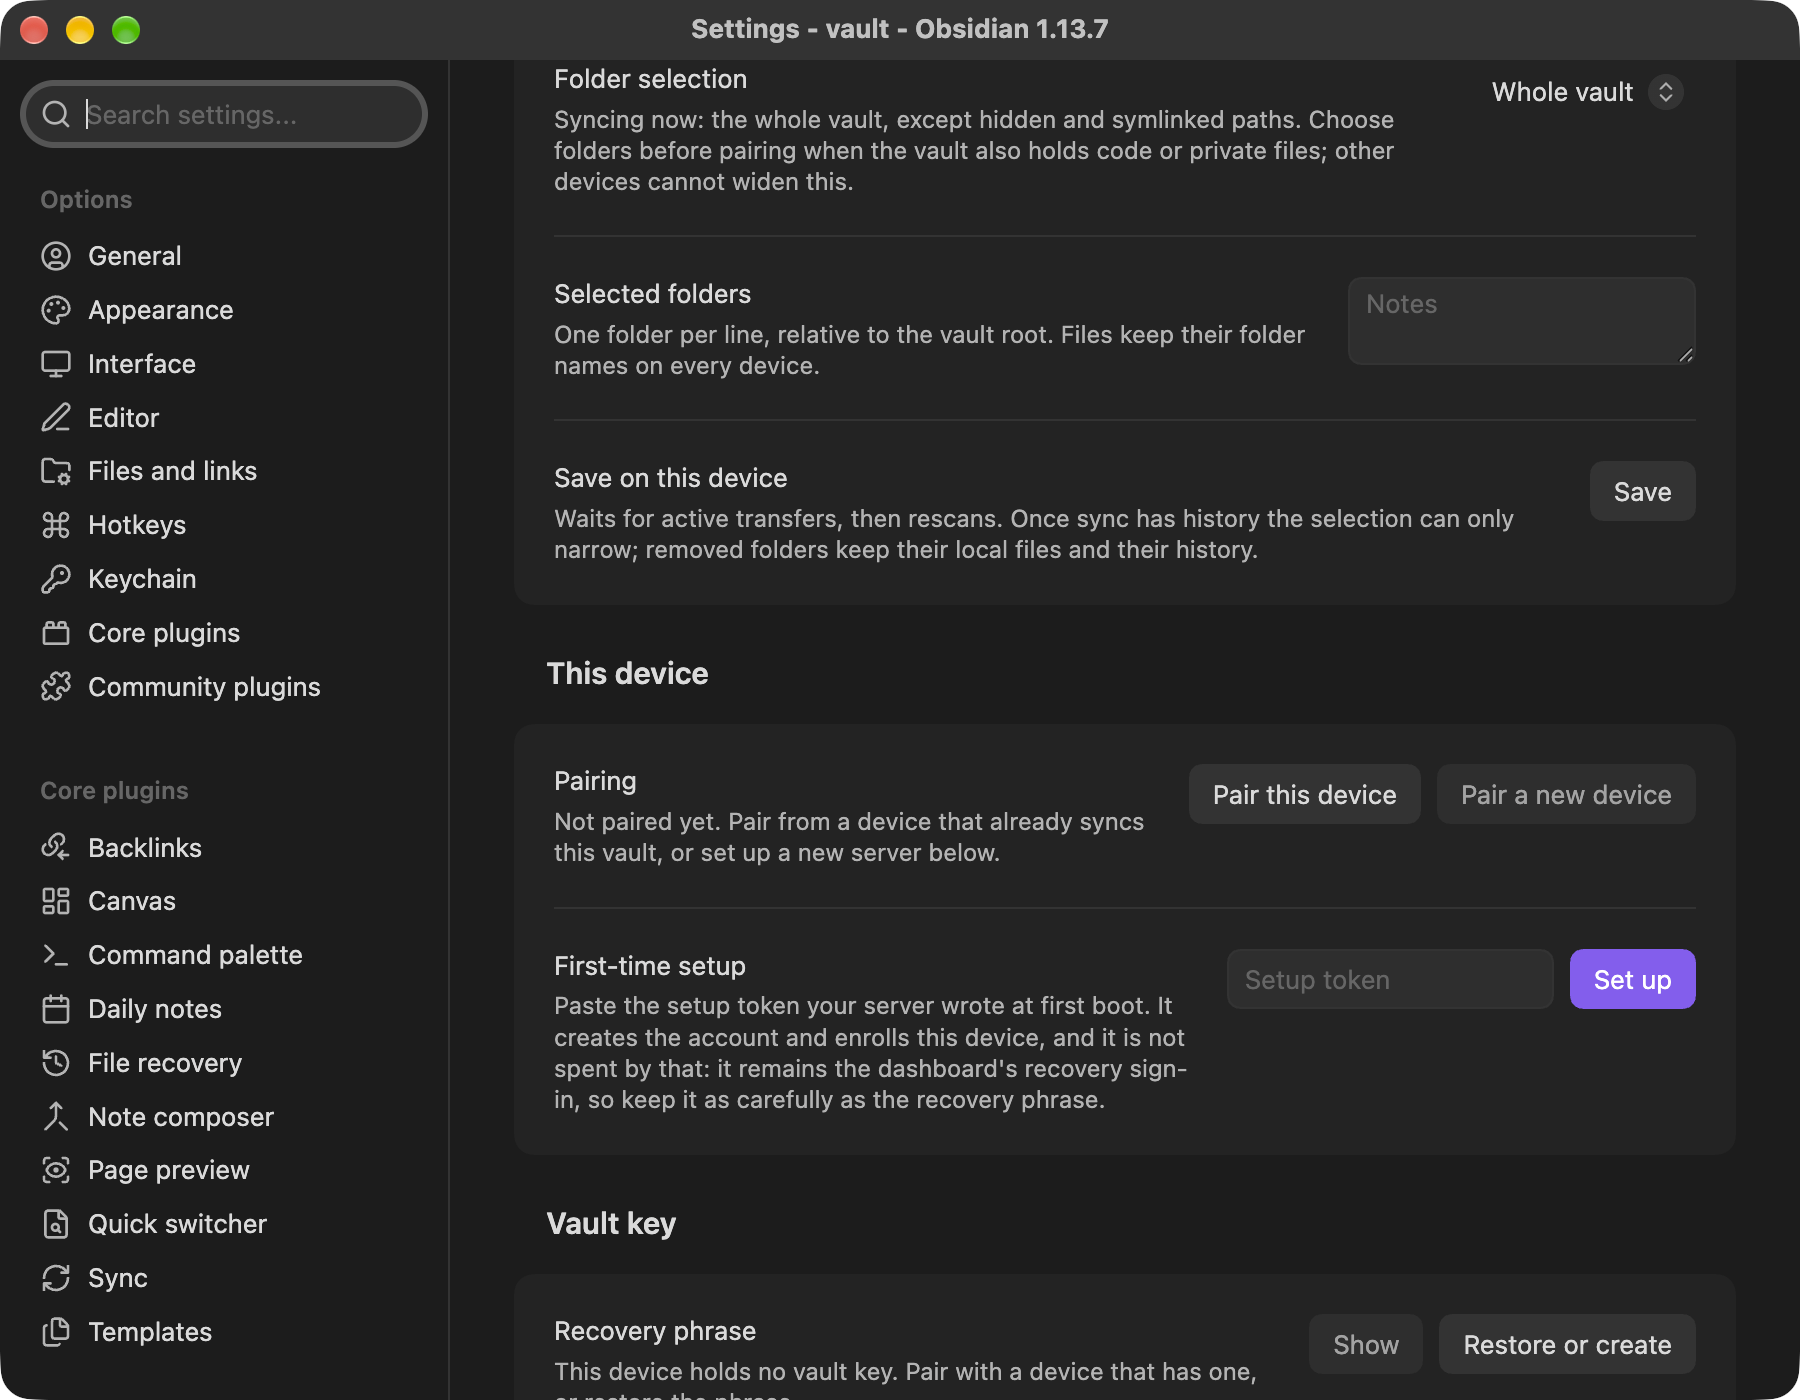
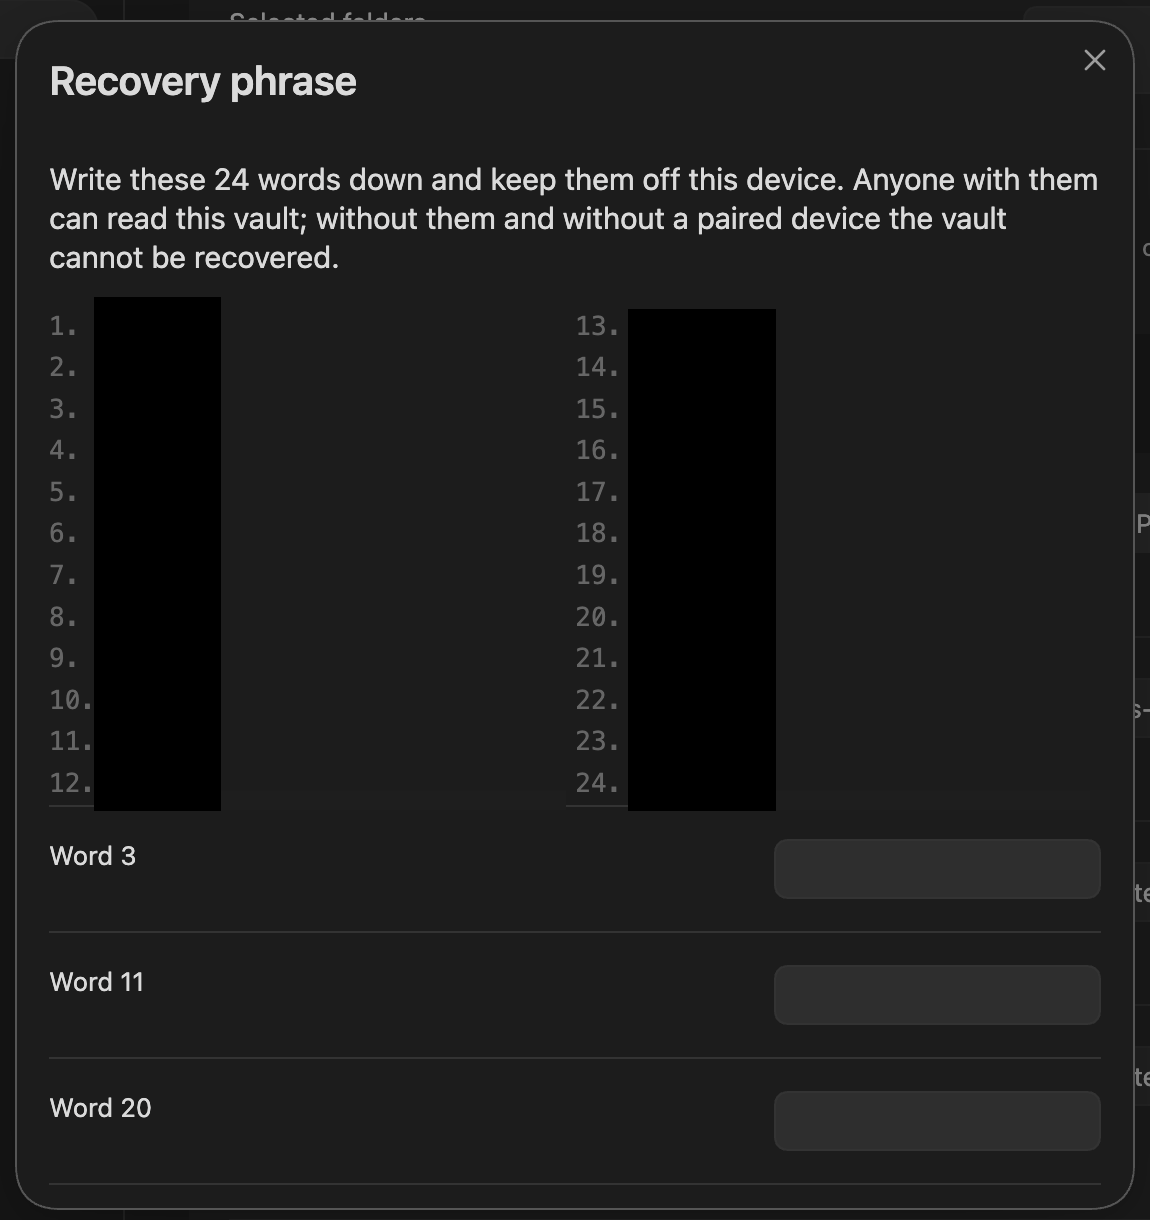
- Keep the recovery phrase. Setup generates the vault key on this device and shows a 24-word phrase once: write it down and keep it somewhere other than this device, because the server holds ciphertext only and cannot recover a vault for you.
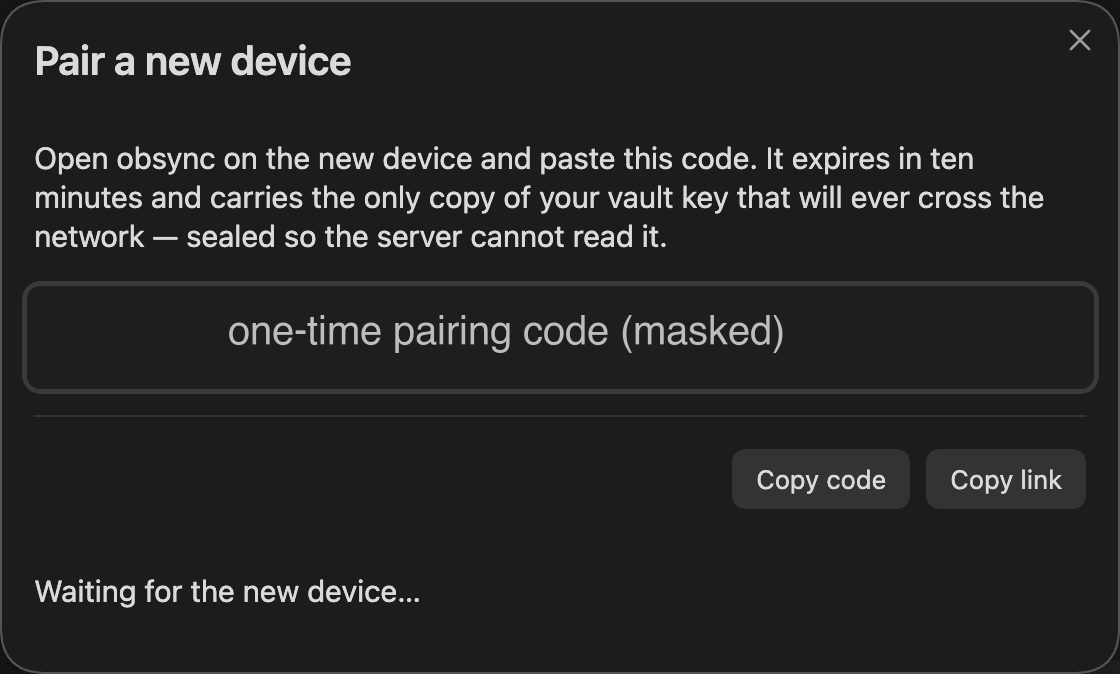
- Pair a second device with a one-time code. Run Pair a new device on the first device, enter the code it shows on the second within ten minutes, and approve the device by name — the vault key travels encrypted under a pairing secret the server never sees.
- Edit on either device and watch it land. Type in a note on one device and it appears on the other within seconds, in both directions, with the status bar showing what sync is doing.
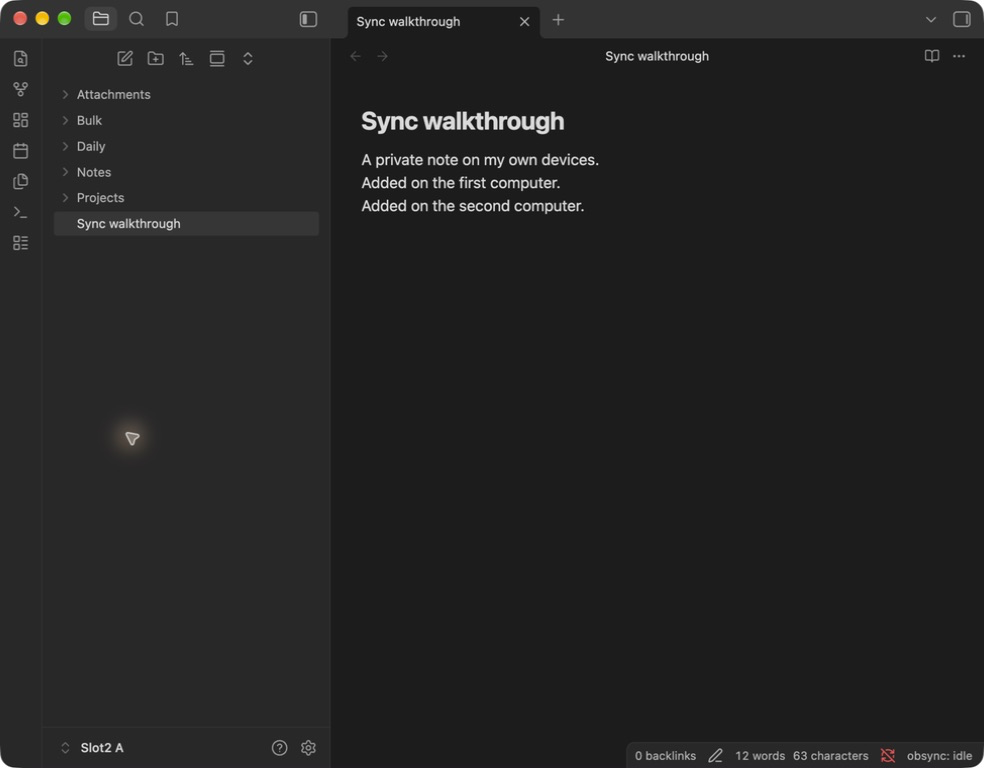
The dashboard's device list and its revoke button are described under See your devices in the daily-use page and were not exercised in the 1.0.0 device run recorded in the validation runs for 2026-09-14.
Capture provenance: the first four screenshots record the original installation journey. The fifth shows the two-way edit check on the 1.1.3 candidate. The validation records identify newer recovery screens and the exact builds tested; the sections below describe the current controls.
Set up this computer (the first device)
Use Obsidian 1.13.0 or newer on each device. Credentials and vault keys use Obsidian's native secret storage; unavailable storage stops setup and sync.
- In your vault, open Settings → Community plugins and allow community plugins. Select Browse and search for Self Hosted Private Sync.
- Select Install, then Enable. No hidden folders or manual file copies are part of installation.
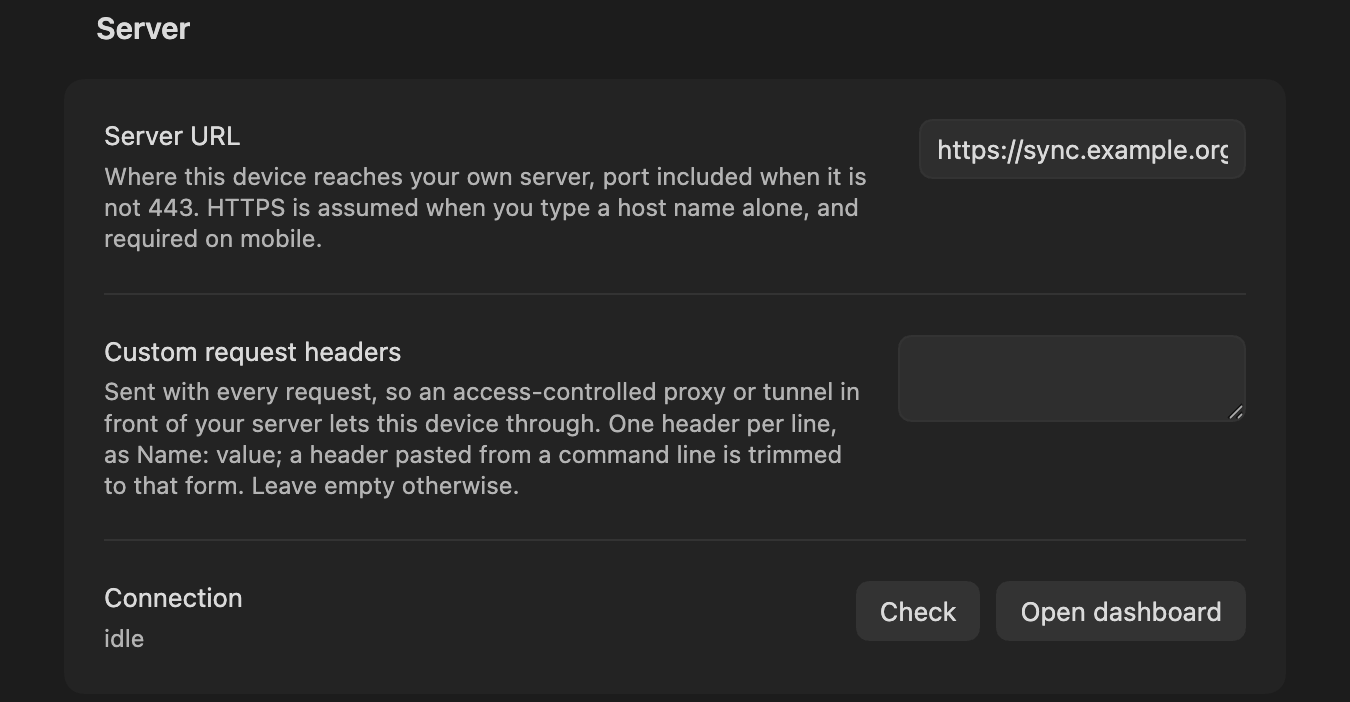
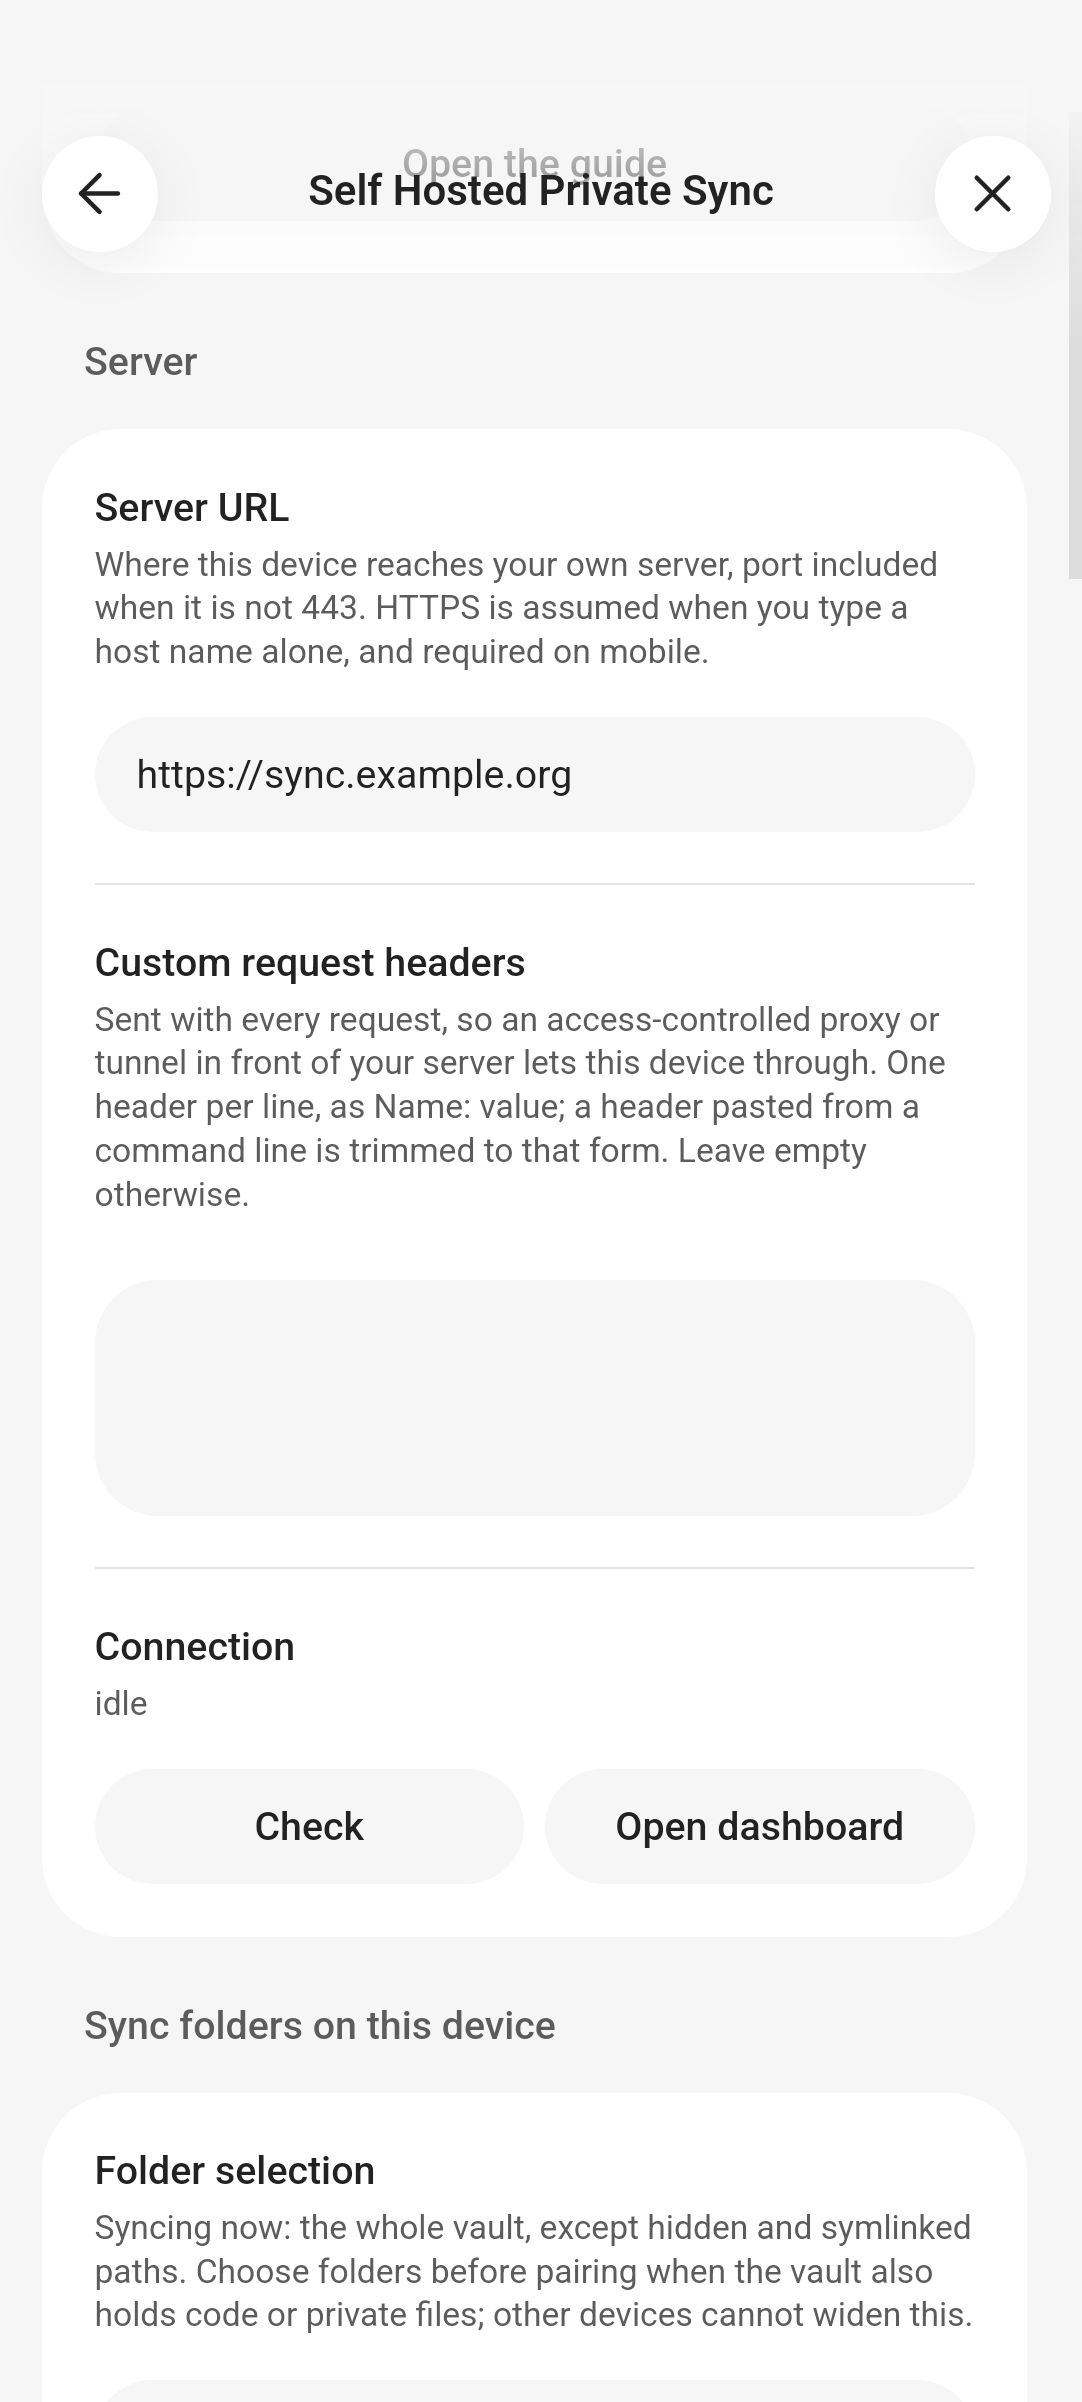
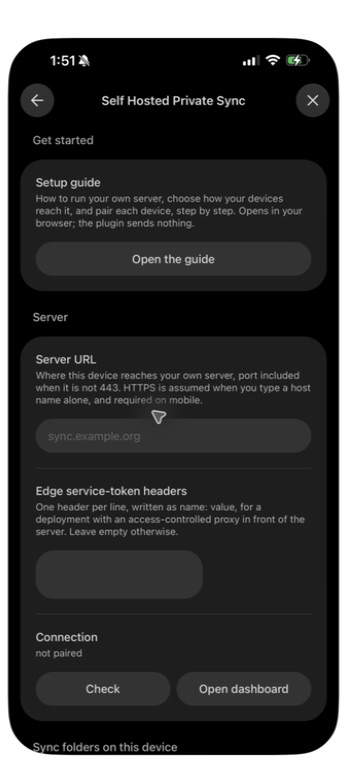
- Open the Self Hosted Private Sync settings tab. Set Server URL to the
URL your devices reach the server at, port included when it is not 443
(
https://name:8443). If an access-controlled edge sits in front of the server, paste its headers under Custom request headers, one per line asName: value. Trying it on one computer? A desktop also accepts plainhttp://127.0.0.1:8080for a server on that same machine; Obsidian on iOS and Android refuses plain HTTP.
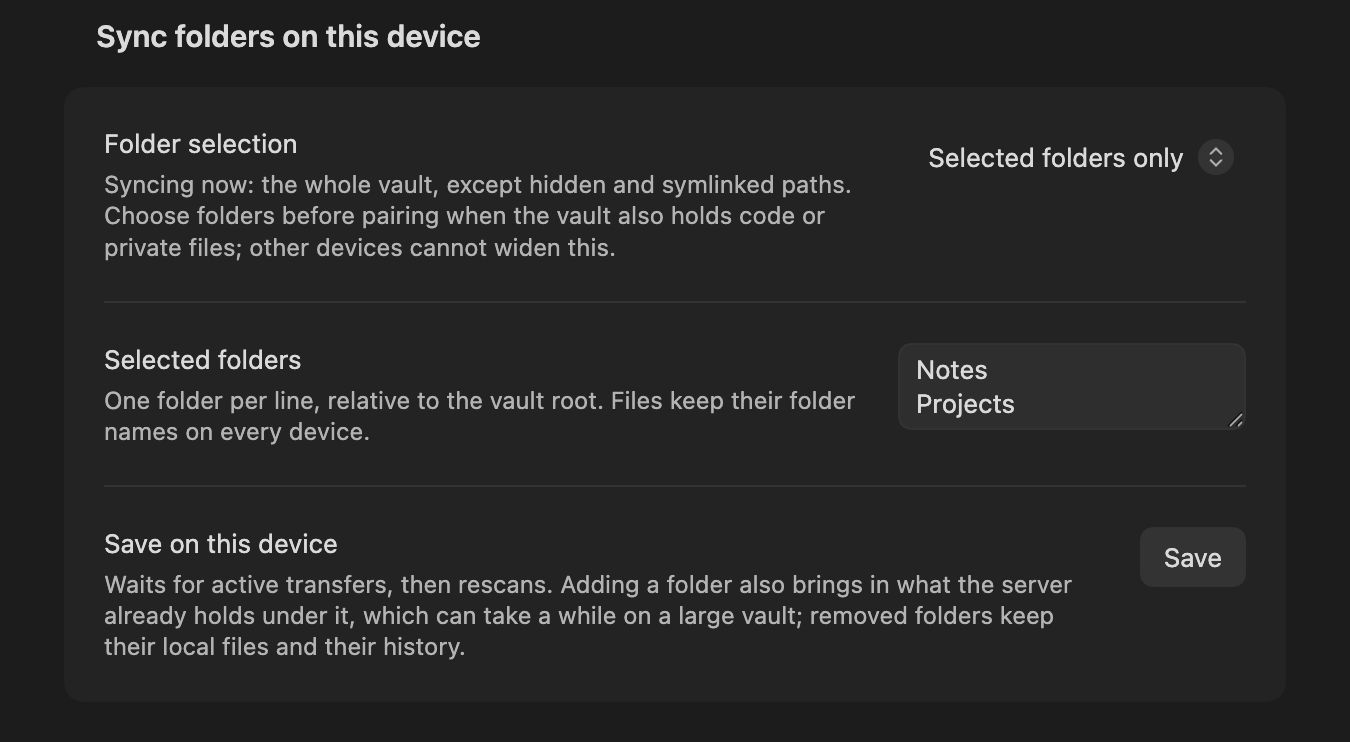
- Under Sync folders on this device, choose Selected folders only
if the vault also contains code or files you do not want shared, and
enter relative folders such as
Notes, one per line. Set up or recover and Pair this device apply what you typed; Save applies it on its own. An empty selected list syncs no files; Whole vault is the default. To stage a first sync within one vault, keep personal files in an excluded folder, test disposable notes inside the selected folder, then move the personal files in and run Sync now. You can add folders later in this device's settings; saving the wider selection downloads existing server history for those folders. Removing a folder later keeps its files on this device.
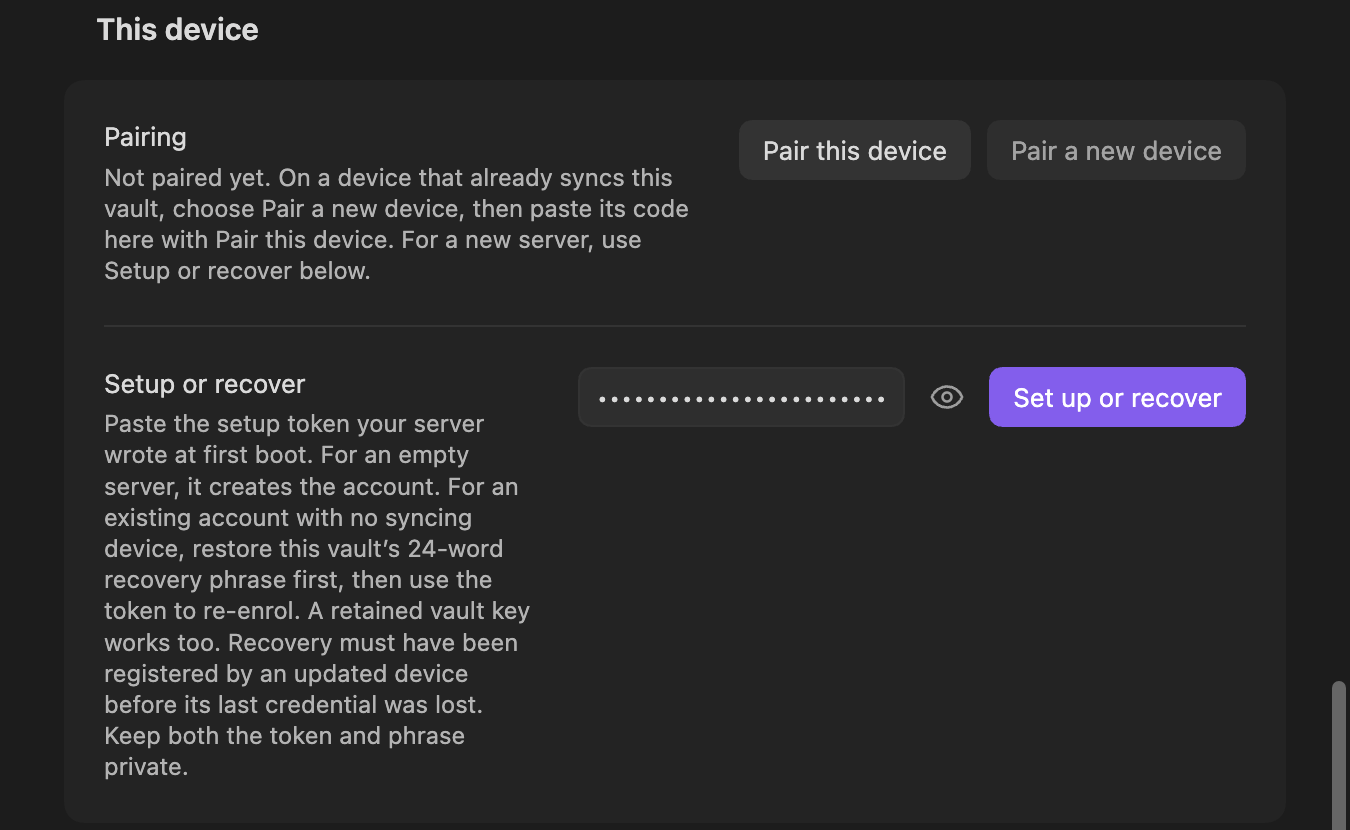
- Under Setup or recover, paste the setup token and select Set up or recover. The plugin creates the account and this device, and makes the vault key on this computer.
- It then shows the recovery phrase, 24 words, and asks for three of them to check you wrote them down. Write it down and keep it off this machine: without any paired device and without this phrase, the vault cannot be recovered, by design. The server never sees the key. Recovery is what the phrase does and does not get you back. If you closed the dialog without the check, write the phrase down now.
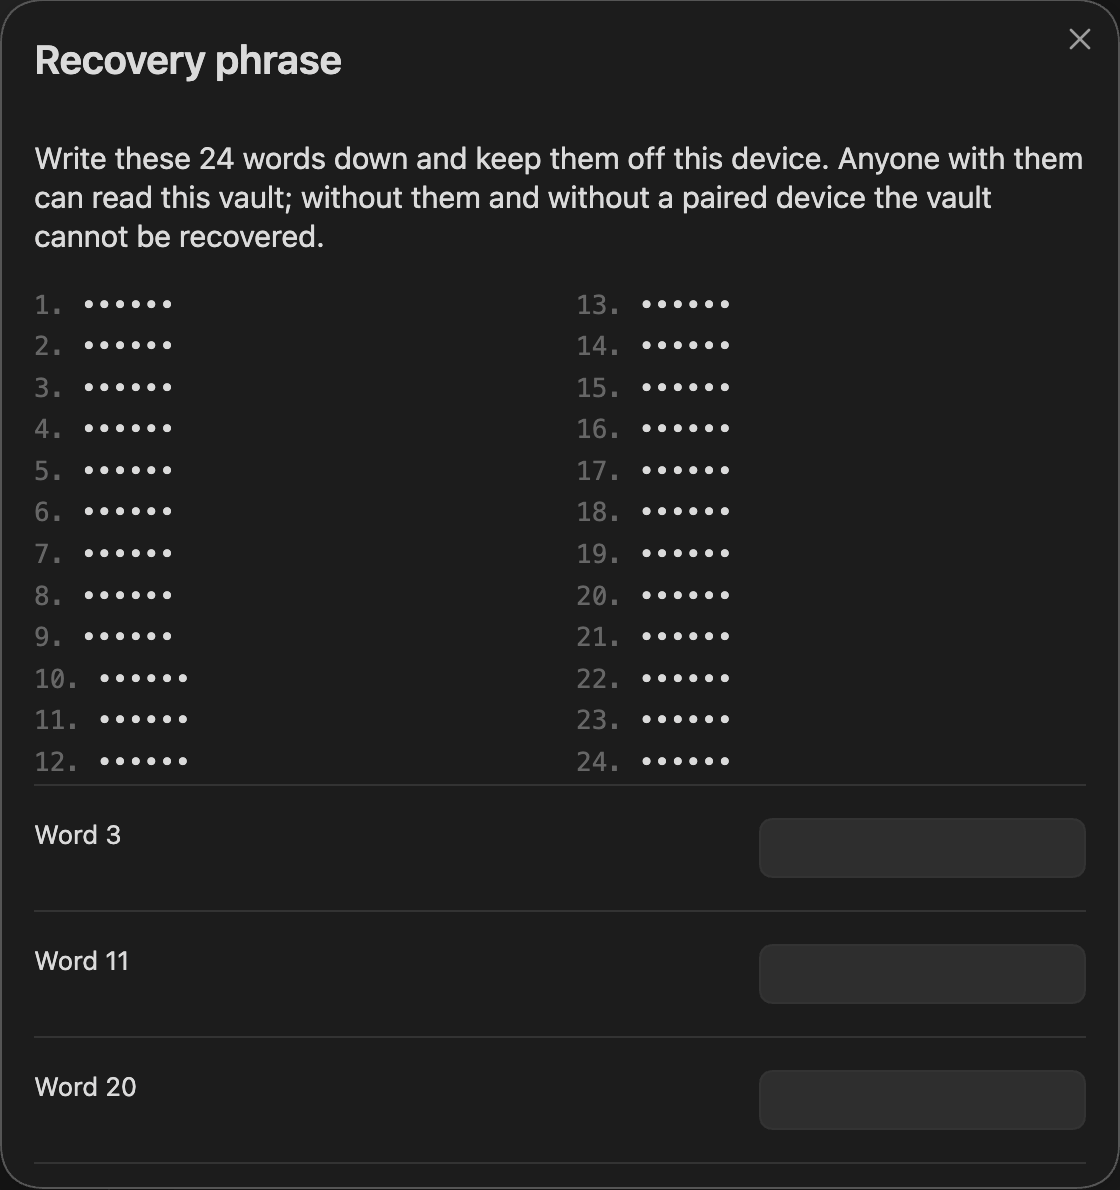
- Sync starts. The status bar shows the state; the command Sync now forces a pass, and Show sync status explains what it is doing.
If a storage error appears instead, reload Obsidian. If it comes back, follow Where your keys are kept; do not repeat server setup.
Prepare an Android phone
On an iPhone, skip to Pair your phone. On Android, Obsidian asks for a few permissions the first time; these are the screens. They come from an Android 15 emulator running Obsidian 1.13.8. No Android device has a recorded sync run yet (Your devices).
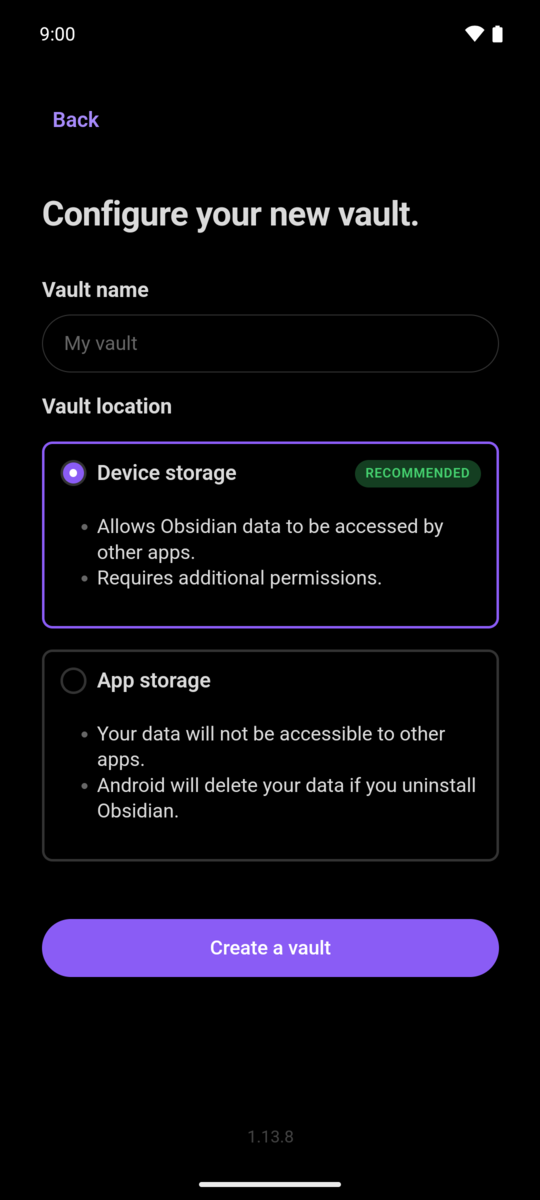
- Create a vault. Open Obsidian and select Create a vault. When it offers Obsidian's own sync service, choose Continue without sync. Name the vault, keep Device storage, and select Create a vault.
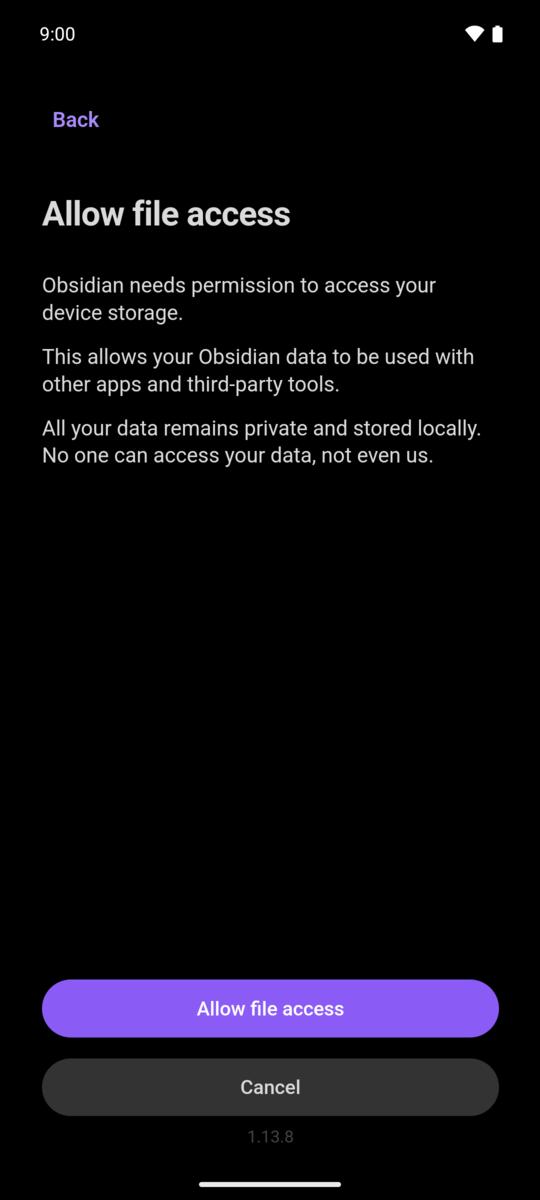
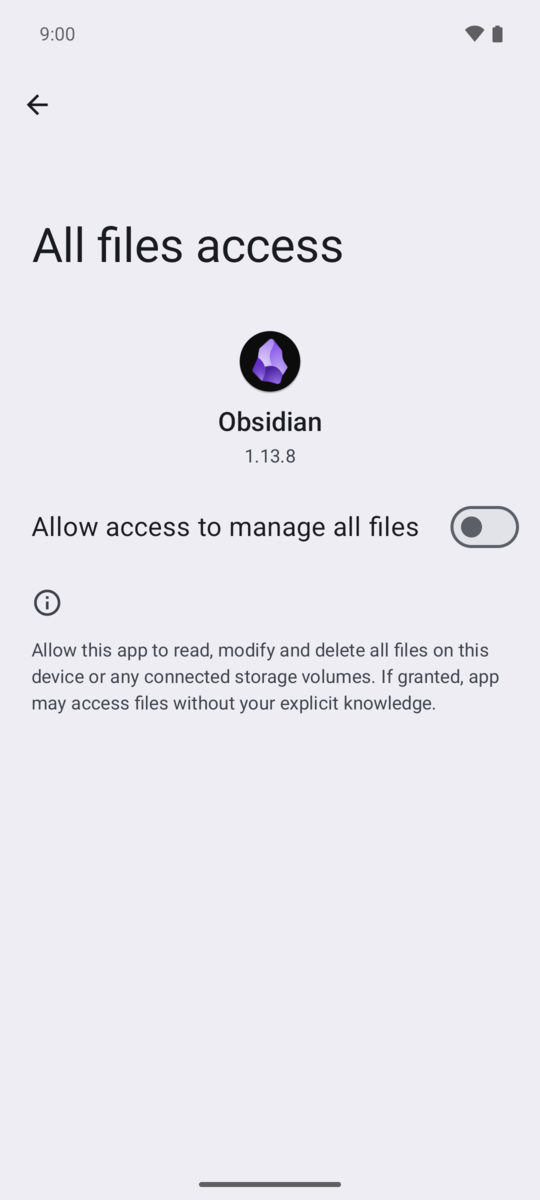
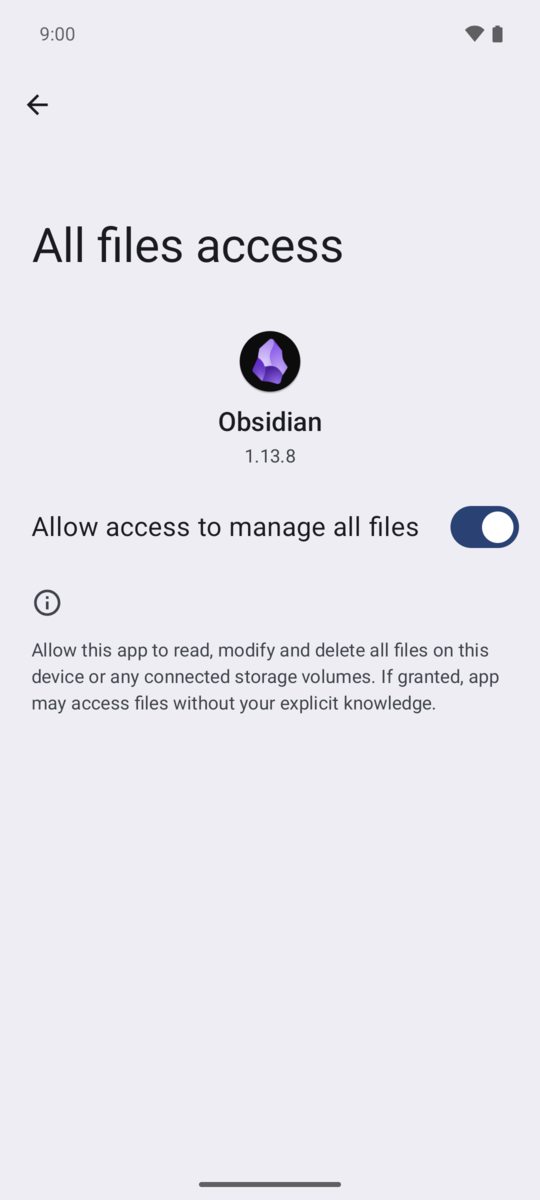
- Allow file access. Select Allow file access. Android opens All files access: turn on Allow access to manage all files for Obsidian, then go back.
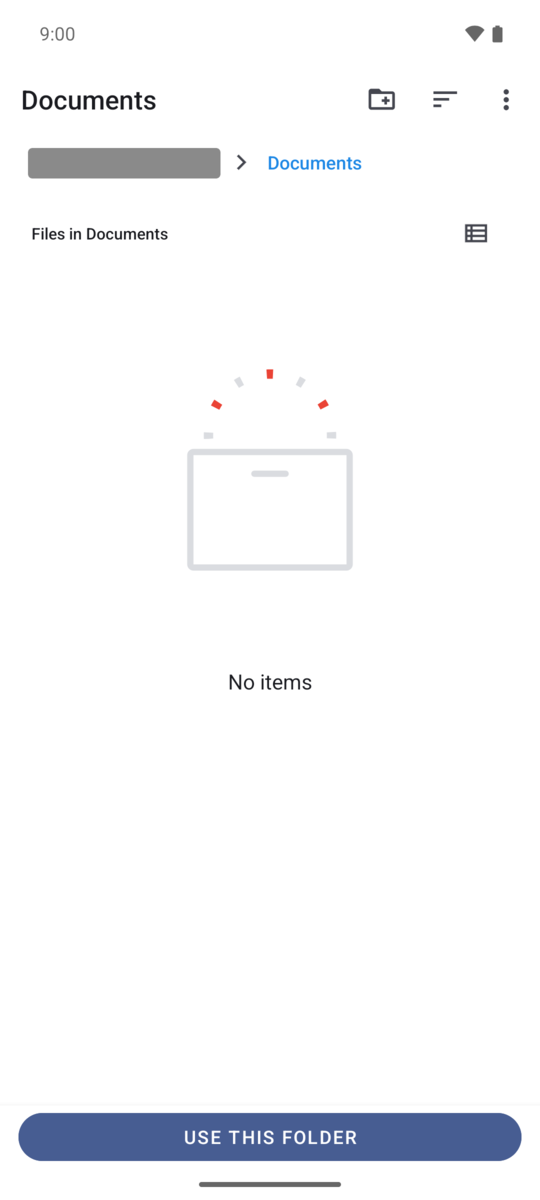
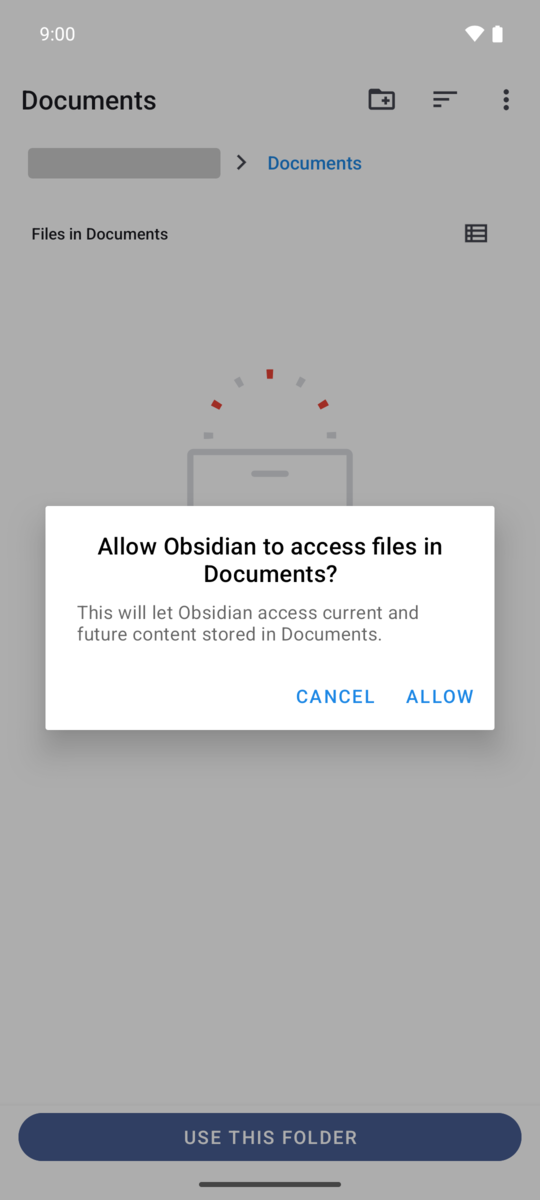
- Choose the folder. When Android shows the Documents folder, select Use this folder, then Allow. The storage name is covered in these captures.
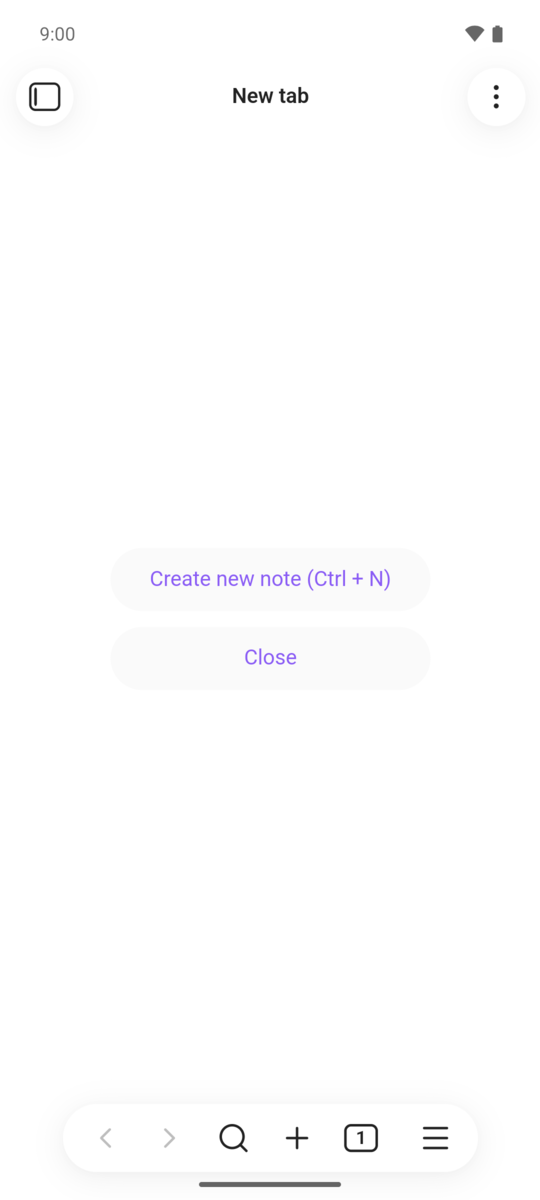
The new, empty vault opens.
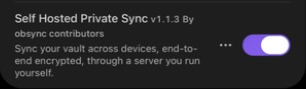
- Allow community plugins. Open Settings → Community plugins and select Exit Restricted mode. Then select Browse, search for Self Hosted Private Sync, and select Install, then Enable.
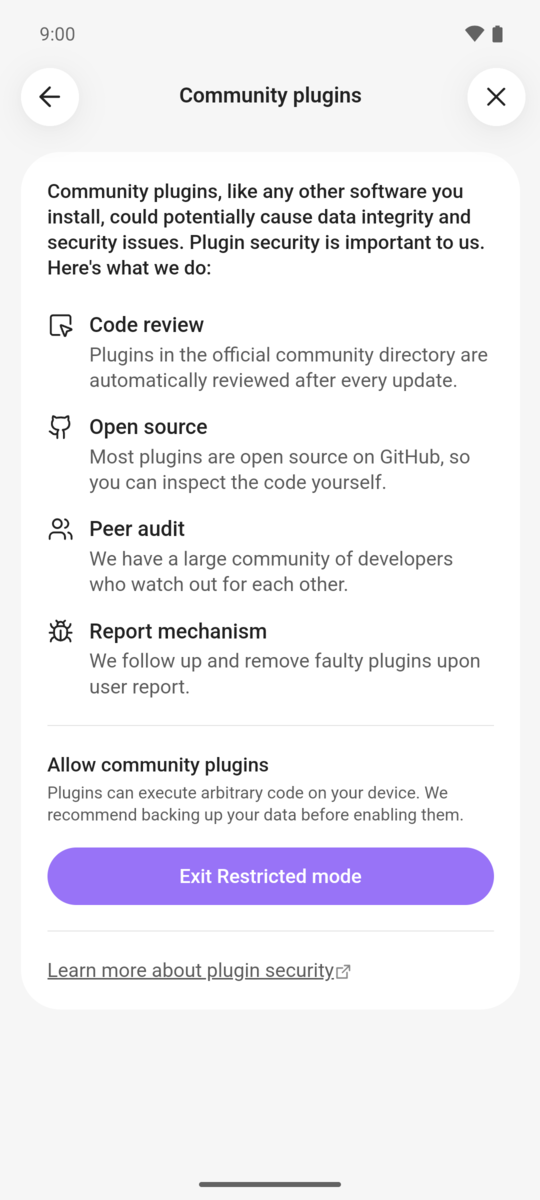
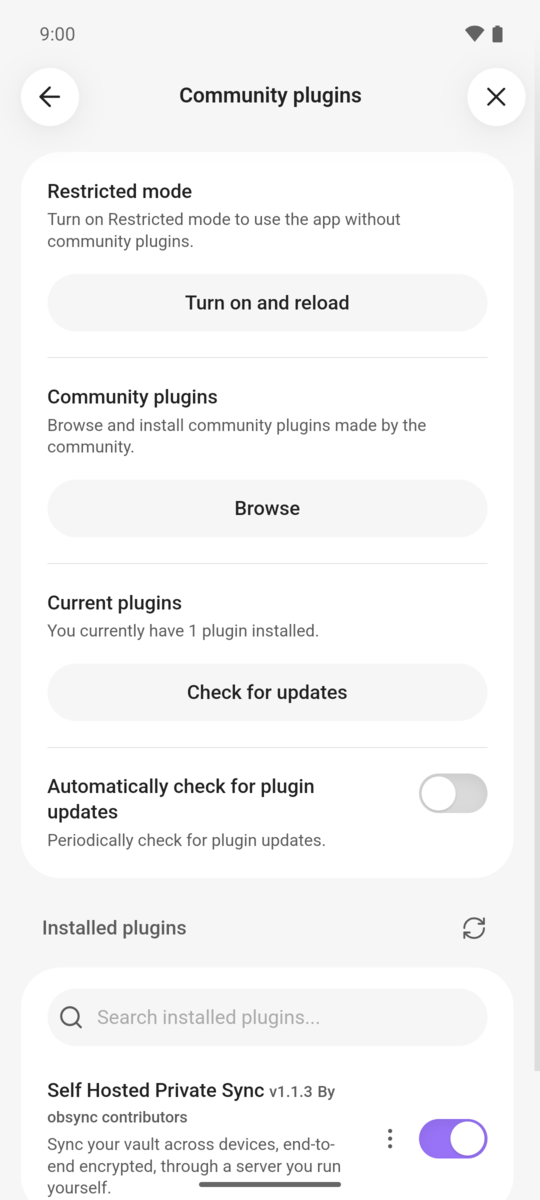
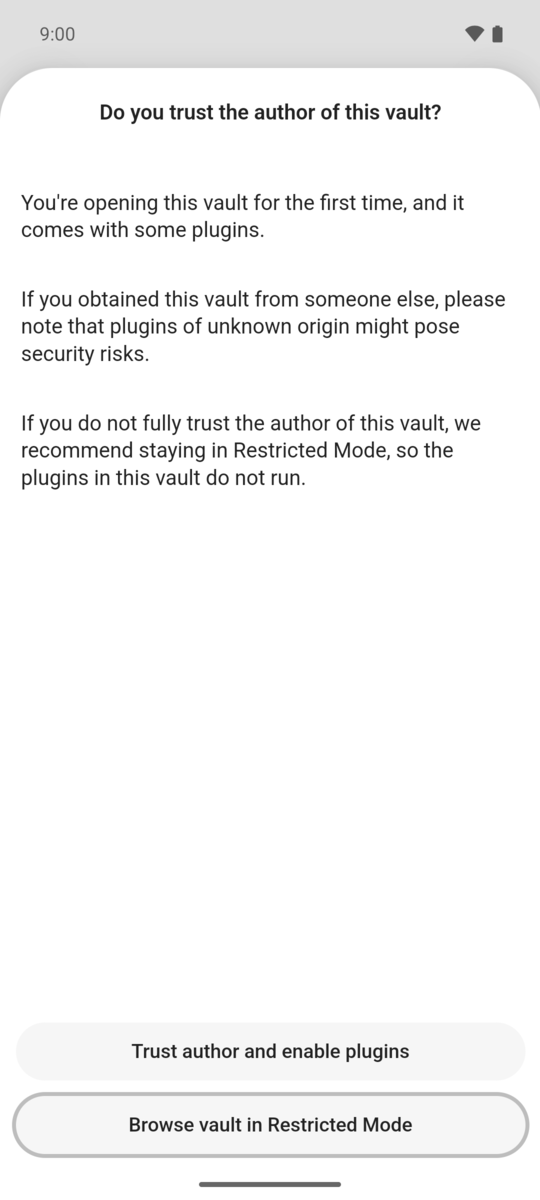
If Obsidian asks whether you trust the author of this vault, the vault already holds plugins. Choose Trust author and enable plugins only for a vault that is your own.
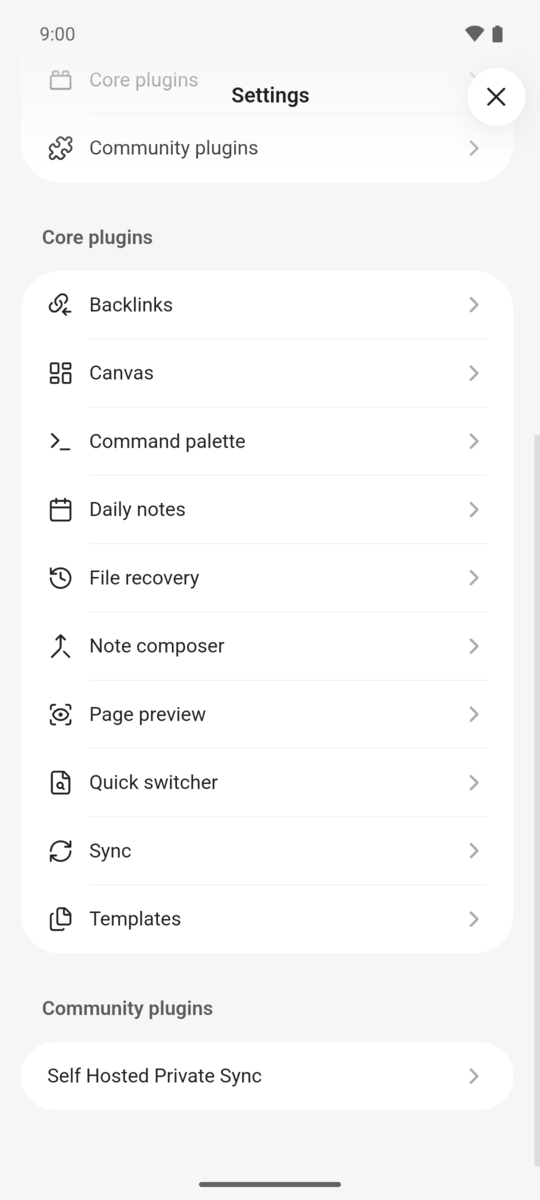
- Open the plugin's settings. In Settings, scroll to Community plugins and select Self Hosted Private Sync. Then continue with Pair your phone.
Android keeps certificates you install yourself apart from the built-in ones, and an app may ignore them. If Obsidian on Android will not connect to a server with its own certificate authority, see the certificate entry in Troubleshooting.
Pair your phone
- In the phone's local vault, install and enable Self Hosted Private Sync through Settings → Community plugins → Browse. Set the same Server URL and connect to its private network if needed. The server must provide HTTPS trusted by the phone. Choose this phone's folder selection before pairing; Pair this device applies it, and it is local, not copied by the pairing code. Files keep their relative folder names.
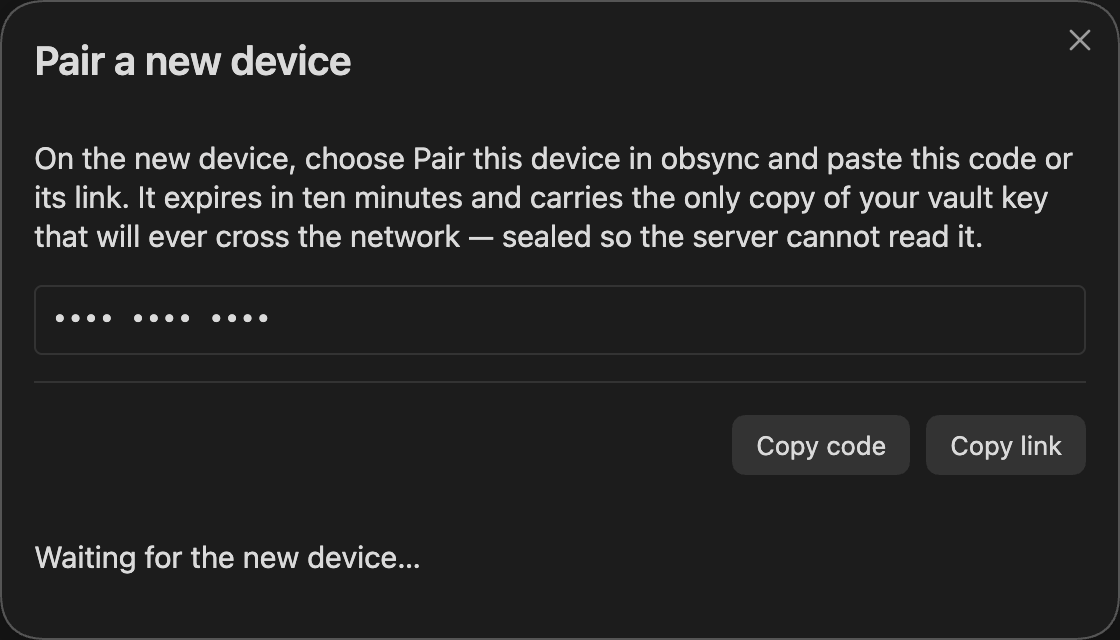
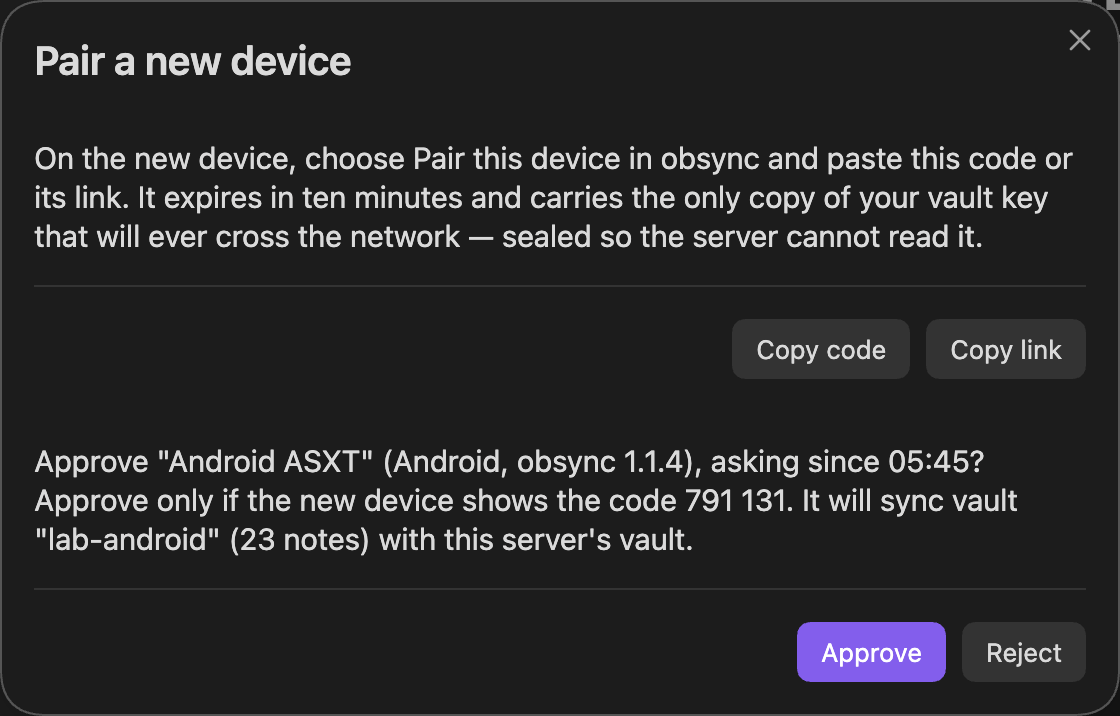
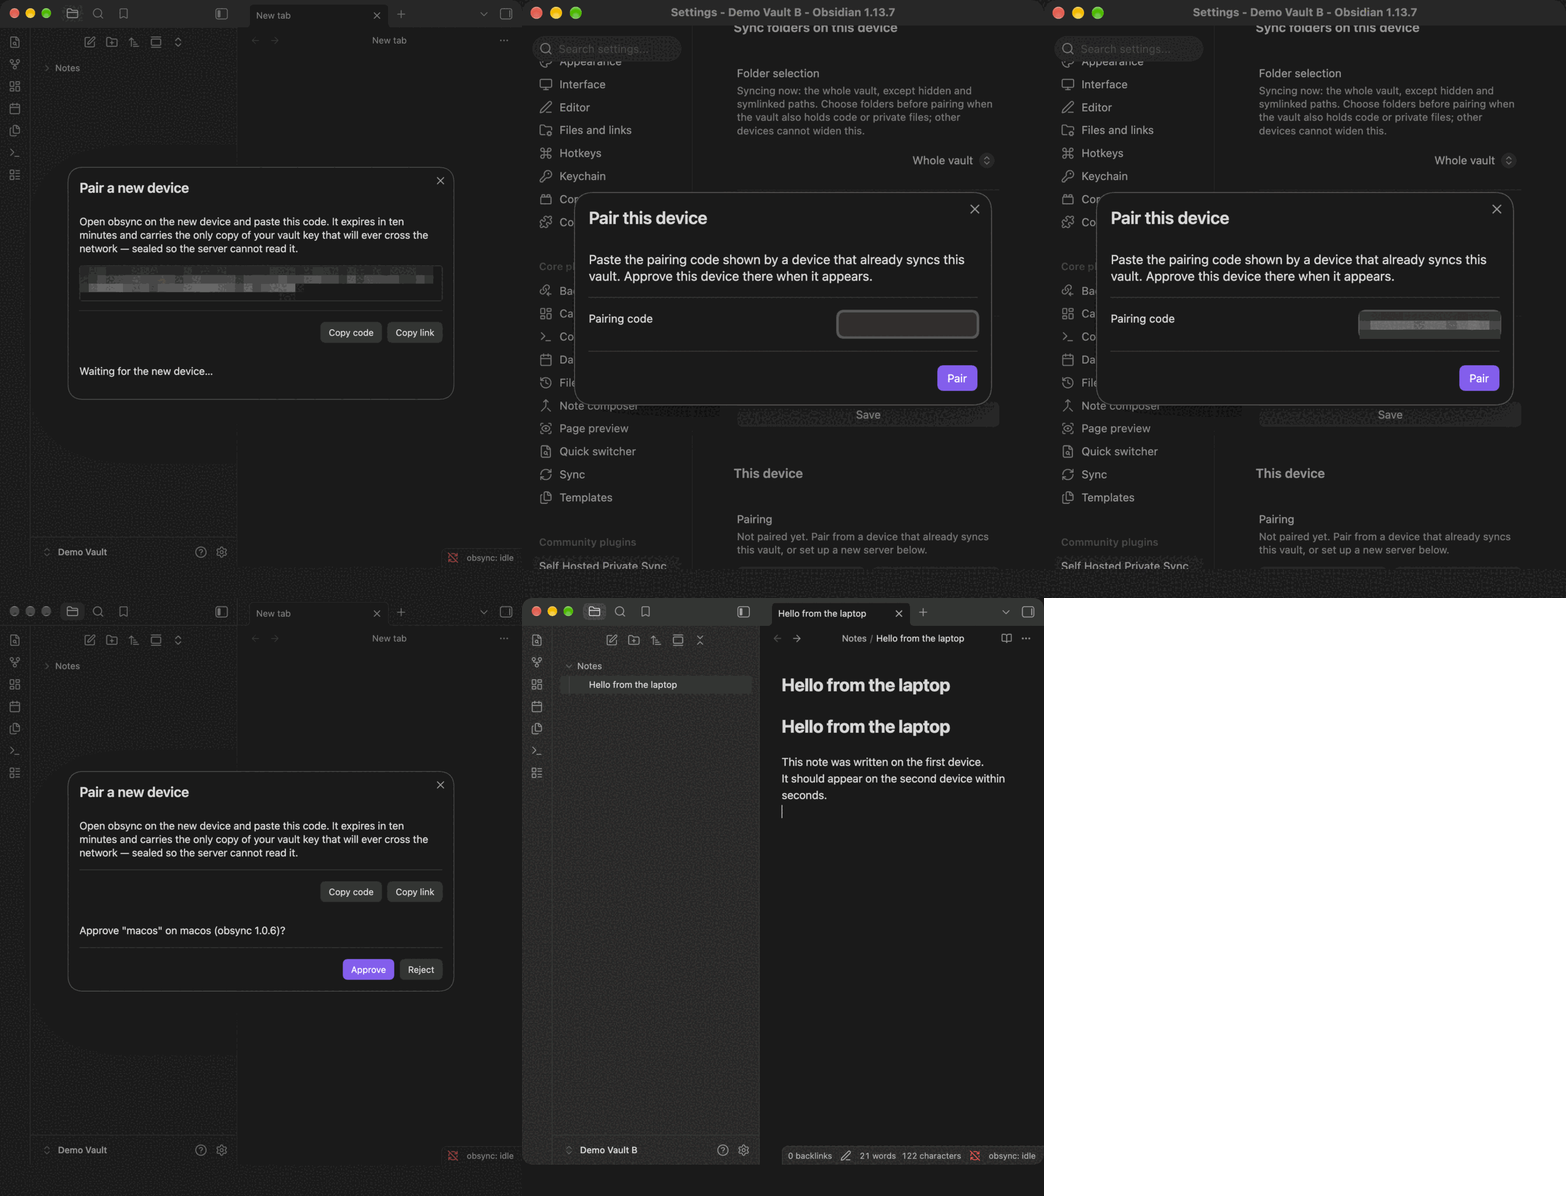
- On the computer, run the command Pair a new device (also a button in
the settings tab). It shows a one-time pairing code, valid ten minutes, and
an
obsidian://obsync-private-sync/pair?code=...link you can send yourself.
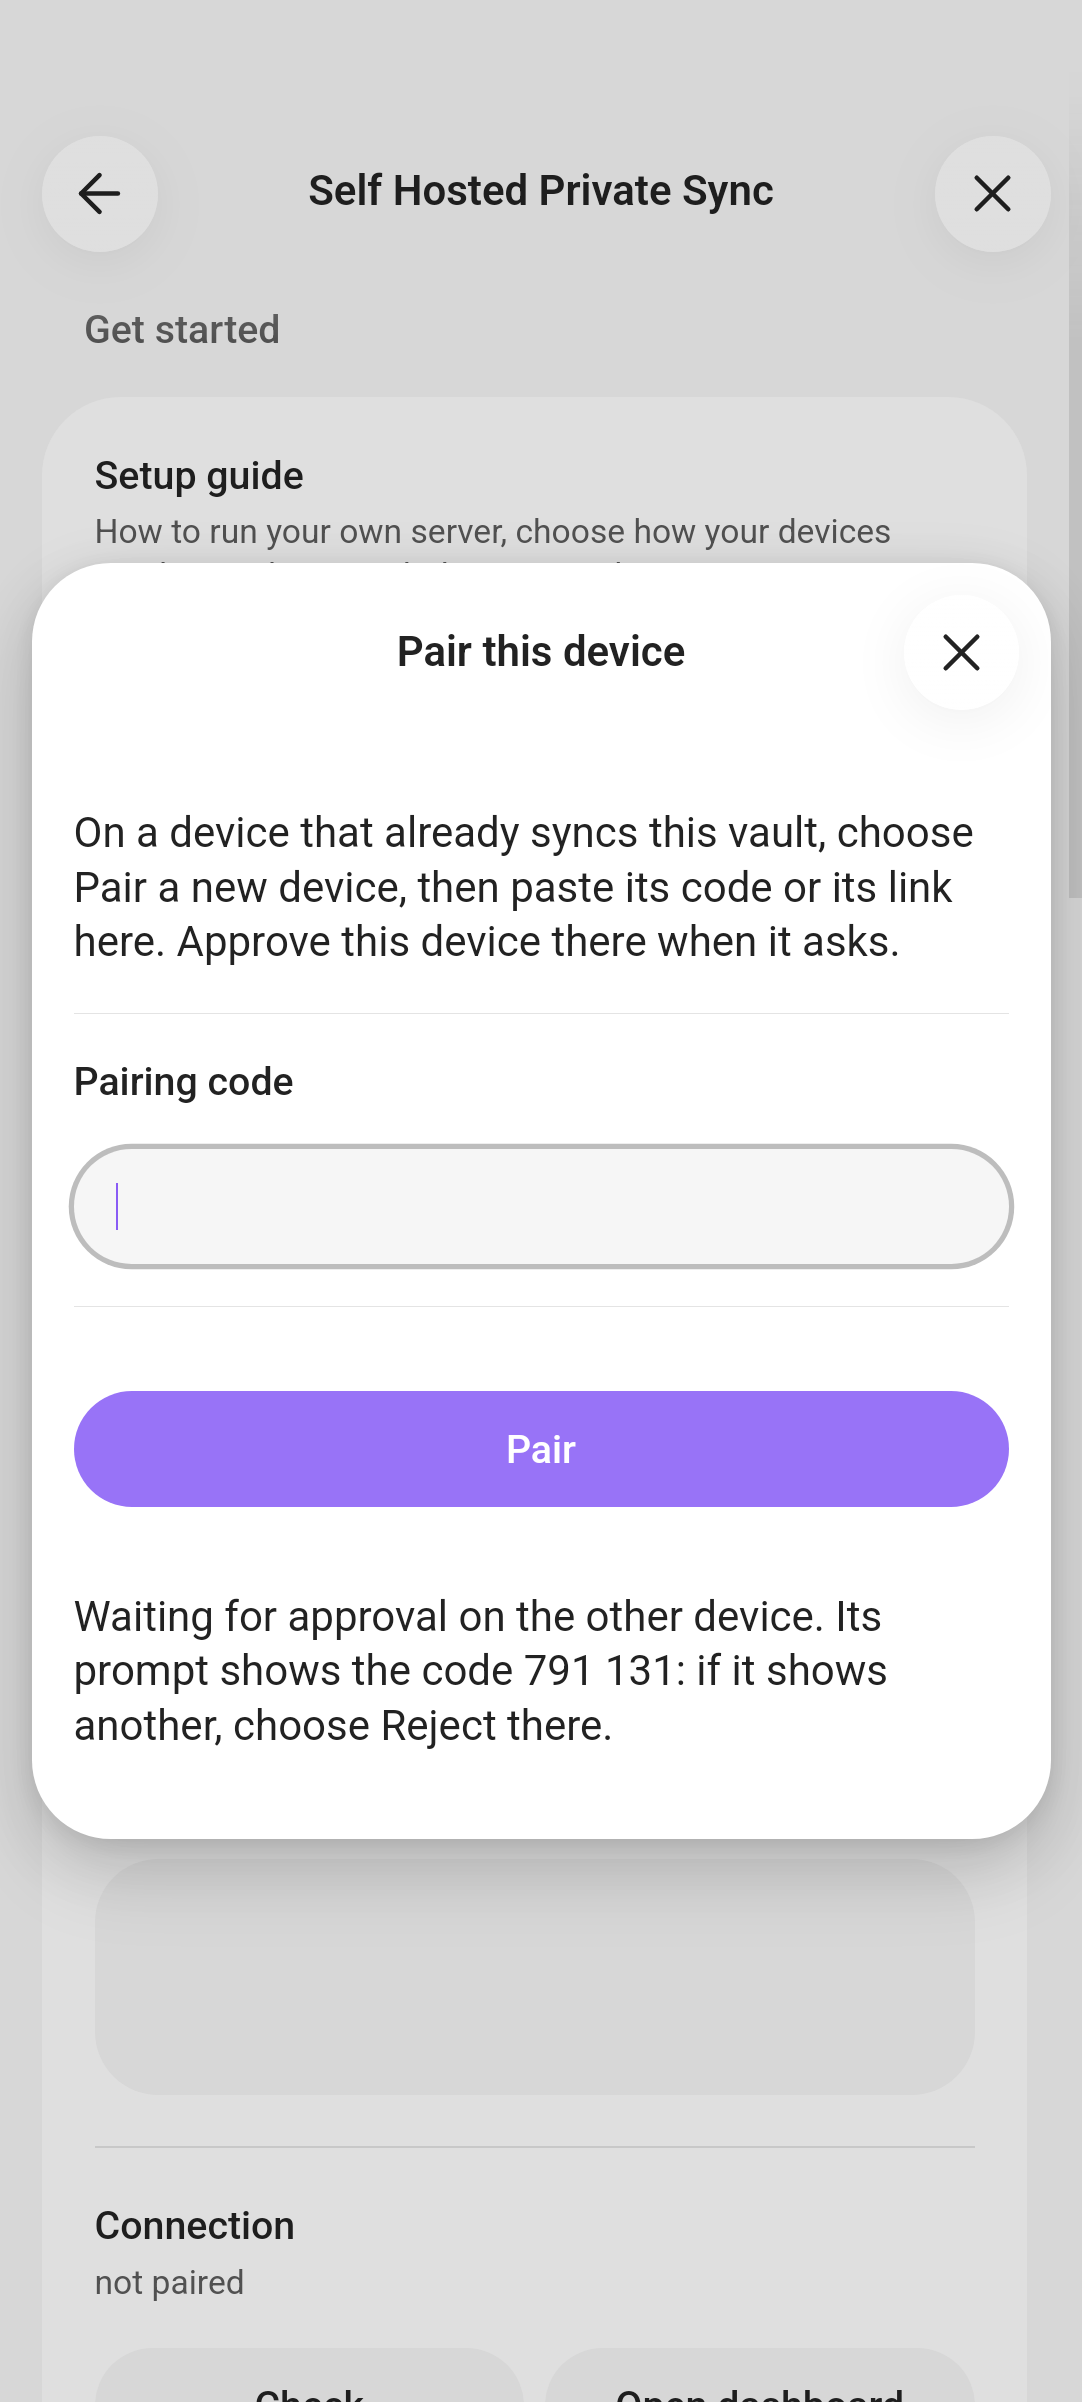
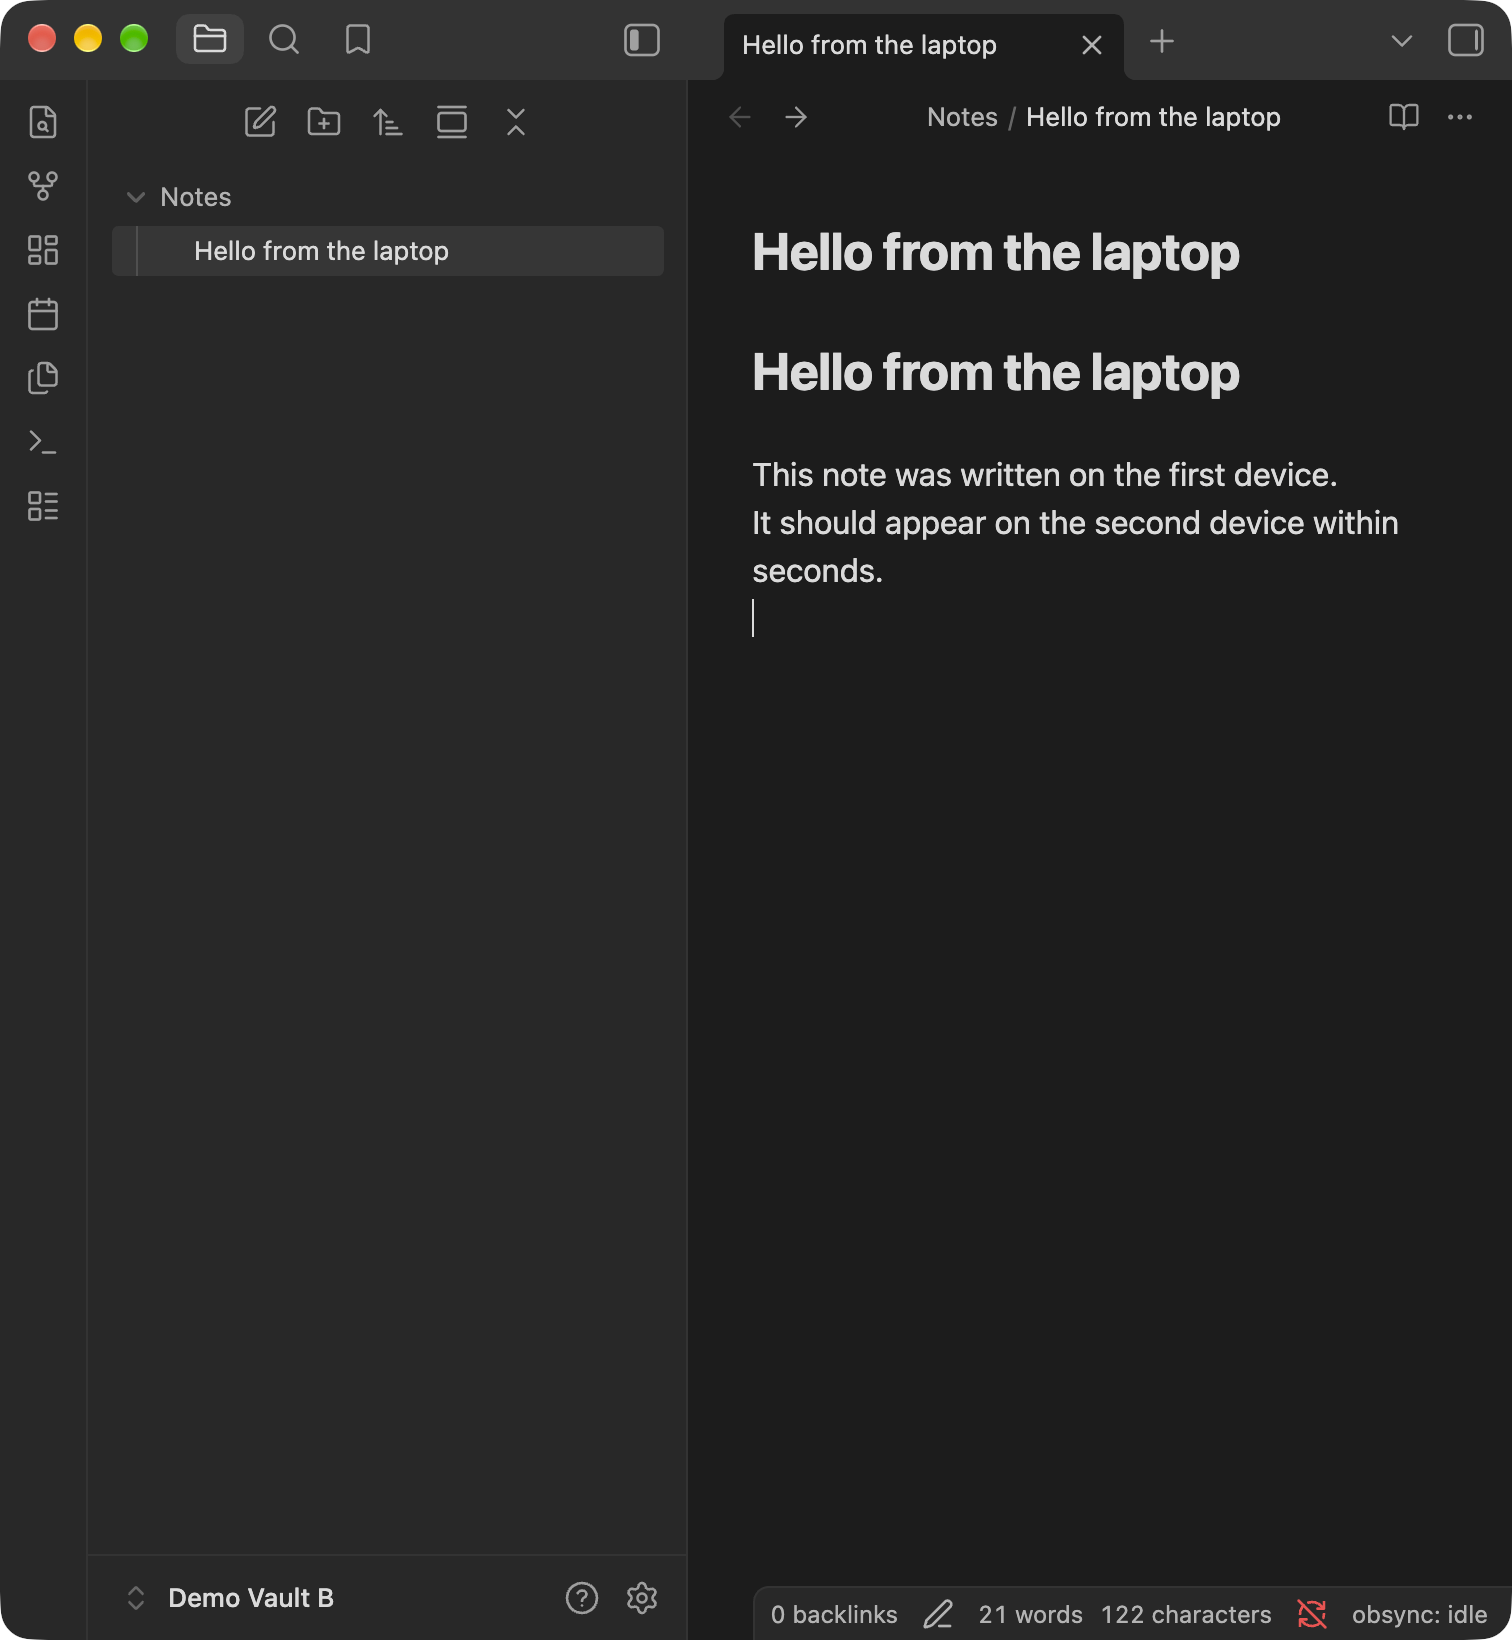
- On the phone, open Pair this device in the settings tab, paste the code under Pairing code and tap Pair — or open the link, which is the same dialog with the code already in it.
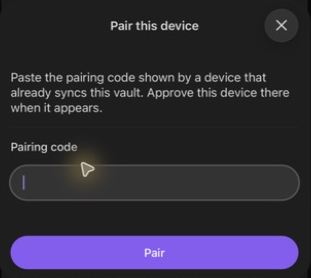
This is the actual phone dialog, captured before entering a code. For certificate setup, follow Add the phone. 4. Back on the computer, check the device name, that both screens show the same match code, and, on updated devices, the new device's vault name and note count before approving. If these are not the vault you intended, or the match codes differ, select Reject. The phone shows its code once the computer asks. The phone receives the vault key encrypted under a key the two devices agree on, which never touches the server; until you approve, the phone has no authority of any kind. If the phone's dialog is closed while it waits, obsync shows its code in a notice and pairing still finishes once you approve within the code's ten minutes; if Obsidian restarts on the phone, or the ten minutes pass, pair again with a new code.
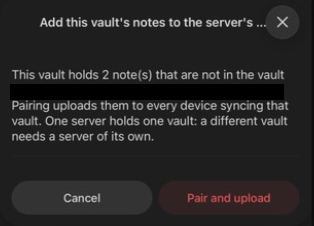
If the phone holds notes the server does not have, it asks before adding them. Pair and upload shares those notes with your other paired devices. Choose Cancel if this is a different vault you want to keep separate; it needs its own server. The server address is covered in this screenshot.
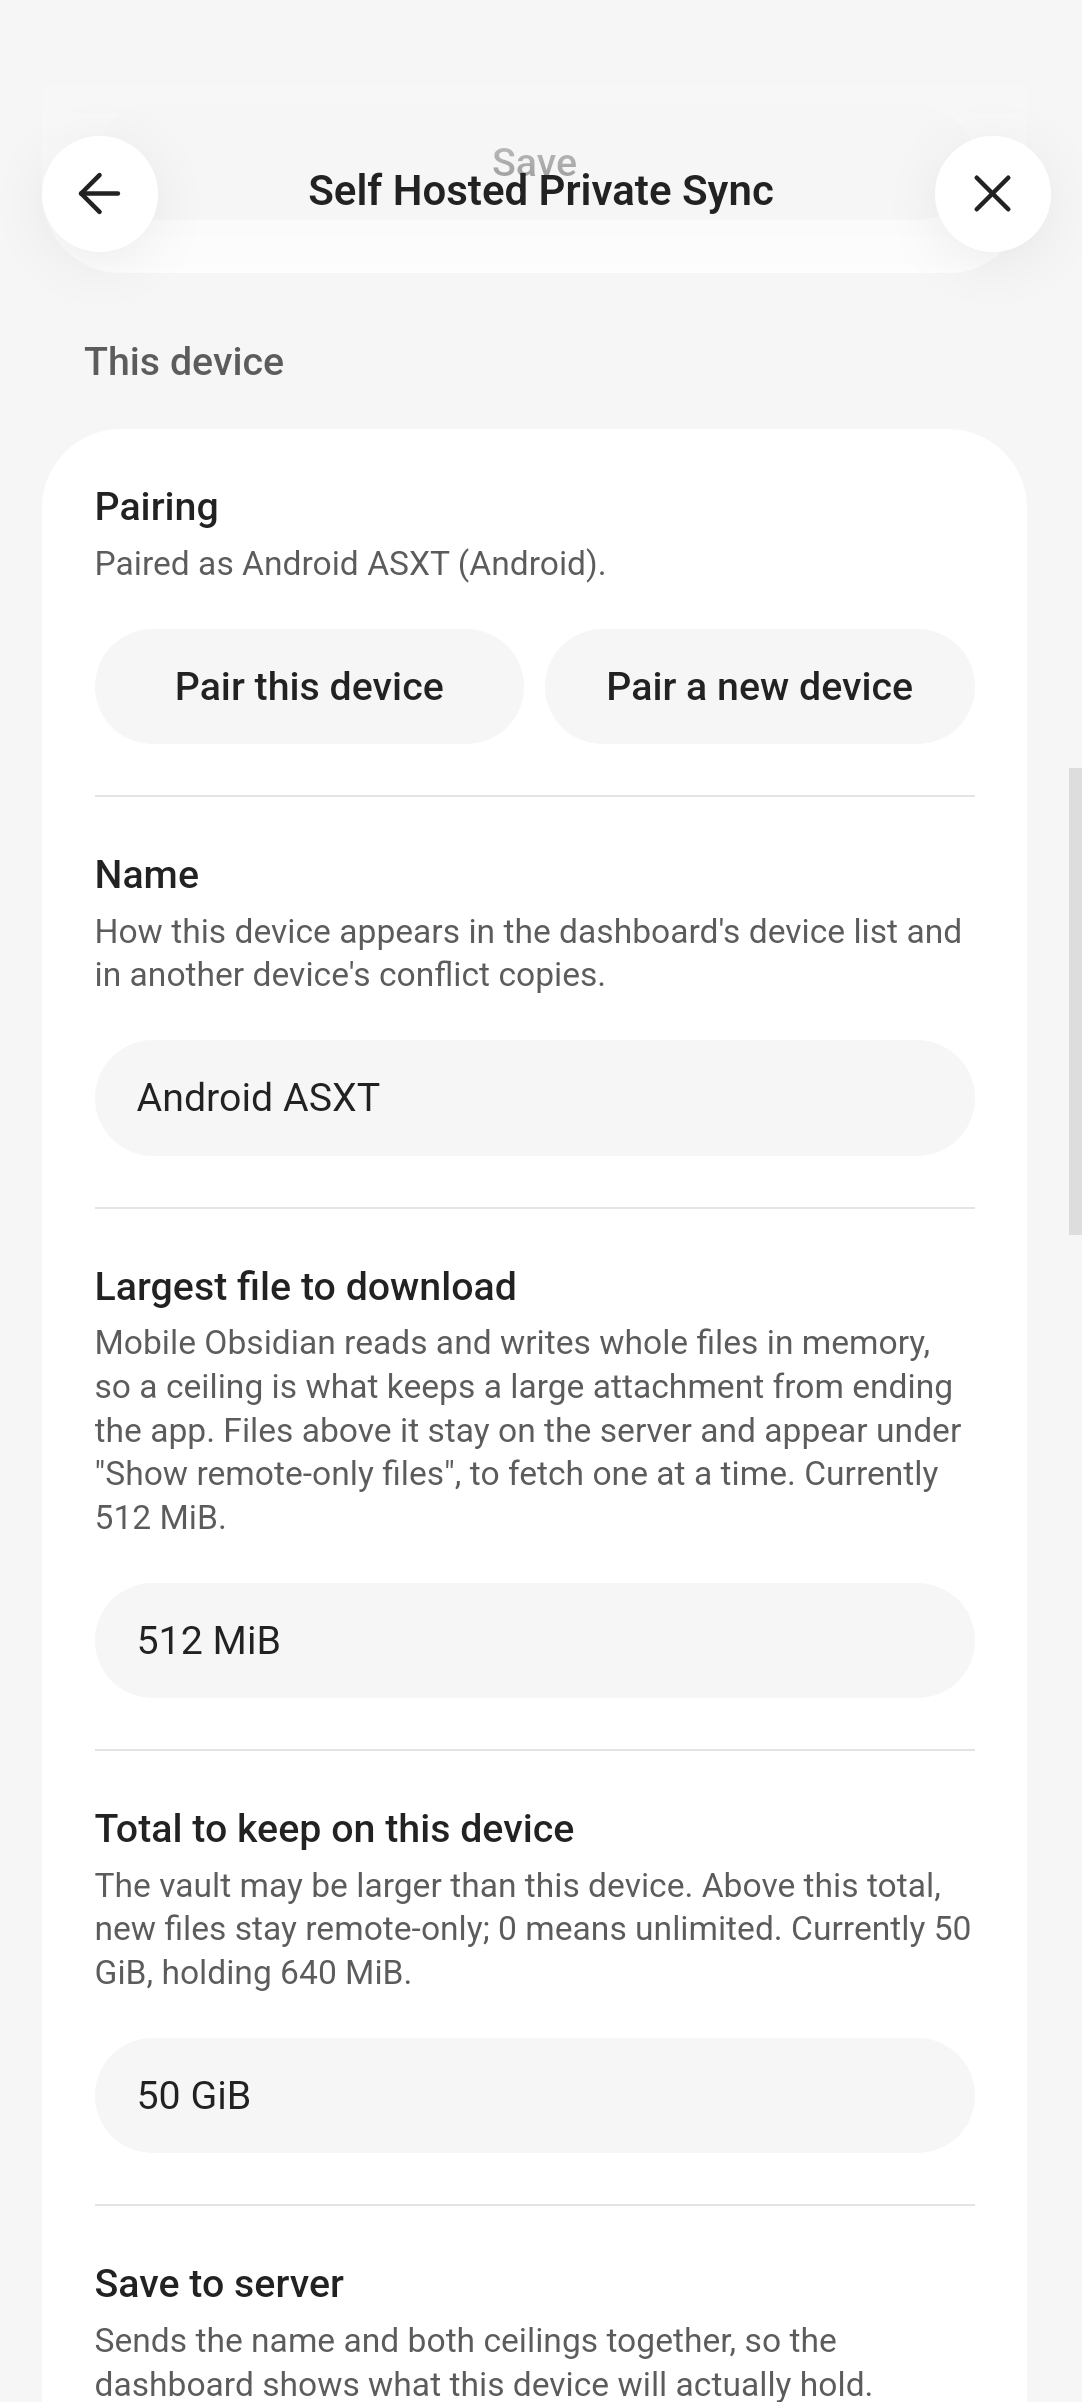
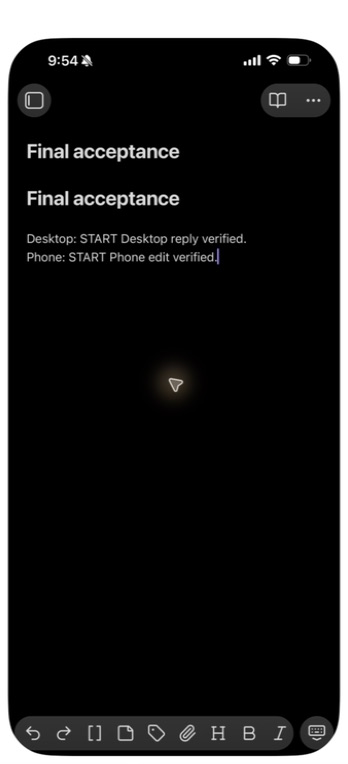
- Edit a note on the phone. It appears on the computer within seconds, and the other way round. That is the whole loop.
The second vault does not have to be empty. If it already holds the same notes -- copied over by hand, or kept in step by another sync tool until now -- each note that is byte-identical on both devices stays one note, with no copy. A note whose text differs between the two is kept twice, the second as a conflict copy you review (Conflicts). Turn the other sync tool off before pairing: two tools syncing one vault undo each other's work.
The whole exchange in one loop, both devices being computers:
Next
- Daily use: the commands, the status bar, what syncs, the dashboard, and how to restore a retained version.
- Troubleshooting: symptom, cause, fix.